Do-It-Yourself Awning Instructions
Well, I made another awning. I had some requests to show the process so here it is, in all it’s glory.
I have to give credit to the gal who posted her instructions online. The link is listed on the blogroll. I used her instructions to make my first awning. These instructions aren’t too different from hers. She makes and sells awnings online at TheAwningLady.com.

Holiday Rambler Awning
DISCLAIMER: I am not a perfectionist. I wanted an awning that was ABOUT 13′ by 7′. I ended up with an awning that is 13’4″ by 7’4″. Pretty darn close. I am not a mathematical gal. I just measure and remeasure and guess and hope it works out in the end. I am good with a seam ripper. Just sayin’.
TIPS:
1. I could not find outdoor UV thread in the color I wanted, so I used heavy upholstery thread.
2. If you use striped fabric, it is much easier to line it up so it is square, and you have a good guide for straight stitches.
3. I spend a lot of time folding and safety pinning the fabric into something manageable. My son helped me maneuver the last awning, but he’s been in school so I had to do it myself. Folding it neatly made a world of difference.
4. The scalloped sides that hang down were a pain in the butt. Stitching the bias tape to the edge was a nightmare. It was the most time consuming part of the job. If I ever make another awning (doubtful), I will make more of a gentle wave style edge or just keep them straight like the Airstream awning. The scallop is cute, but wasn’t worth the gray hair it caused me.
5. A large area to lay out the awning is very helpful.
6. For the awning rope (the part that slides in to your awning rail), I used heavy duty clothes line. It’s what I had lying around and I used it on the Airstream and it has worked great. The best thing to use is Keder Awning Rope. If you use this, you don’t have to do the “piping” step and cover the clothes line with fabric. You just sew the Keder Awning Rope right to the awning. MAKE SURE YOU MEASURE THE DIAMETER OF YOUR AWNING RAIL, proceed accordingly.
7. There is a lot of redundancy….sewing the seam, then sewing the bias tape over the seam. The main part of the awning is 3 lengths of fabric. They are sewn together with a french seam (instructions HERE). Not hard, but time consuming. It is a necessary step for the integrity of the awning. They are under a lot of stress and the seams need to be really strong.
8. All Binding is sewn using a ZIG ZAG STITCH.
Supply List:
- Awning Fabric (I purchased mine from Fabricguru.com)
- 1/2″ Binding Tape in coordinating color (I bought 32 yards and used almost all of it).
- Outdoor Thread or Heavy Upholstery Thread
- Awning Rope or Clothes Line.
- Grommet Set
- Hammer
Ok. Ready??
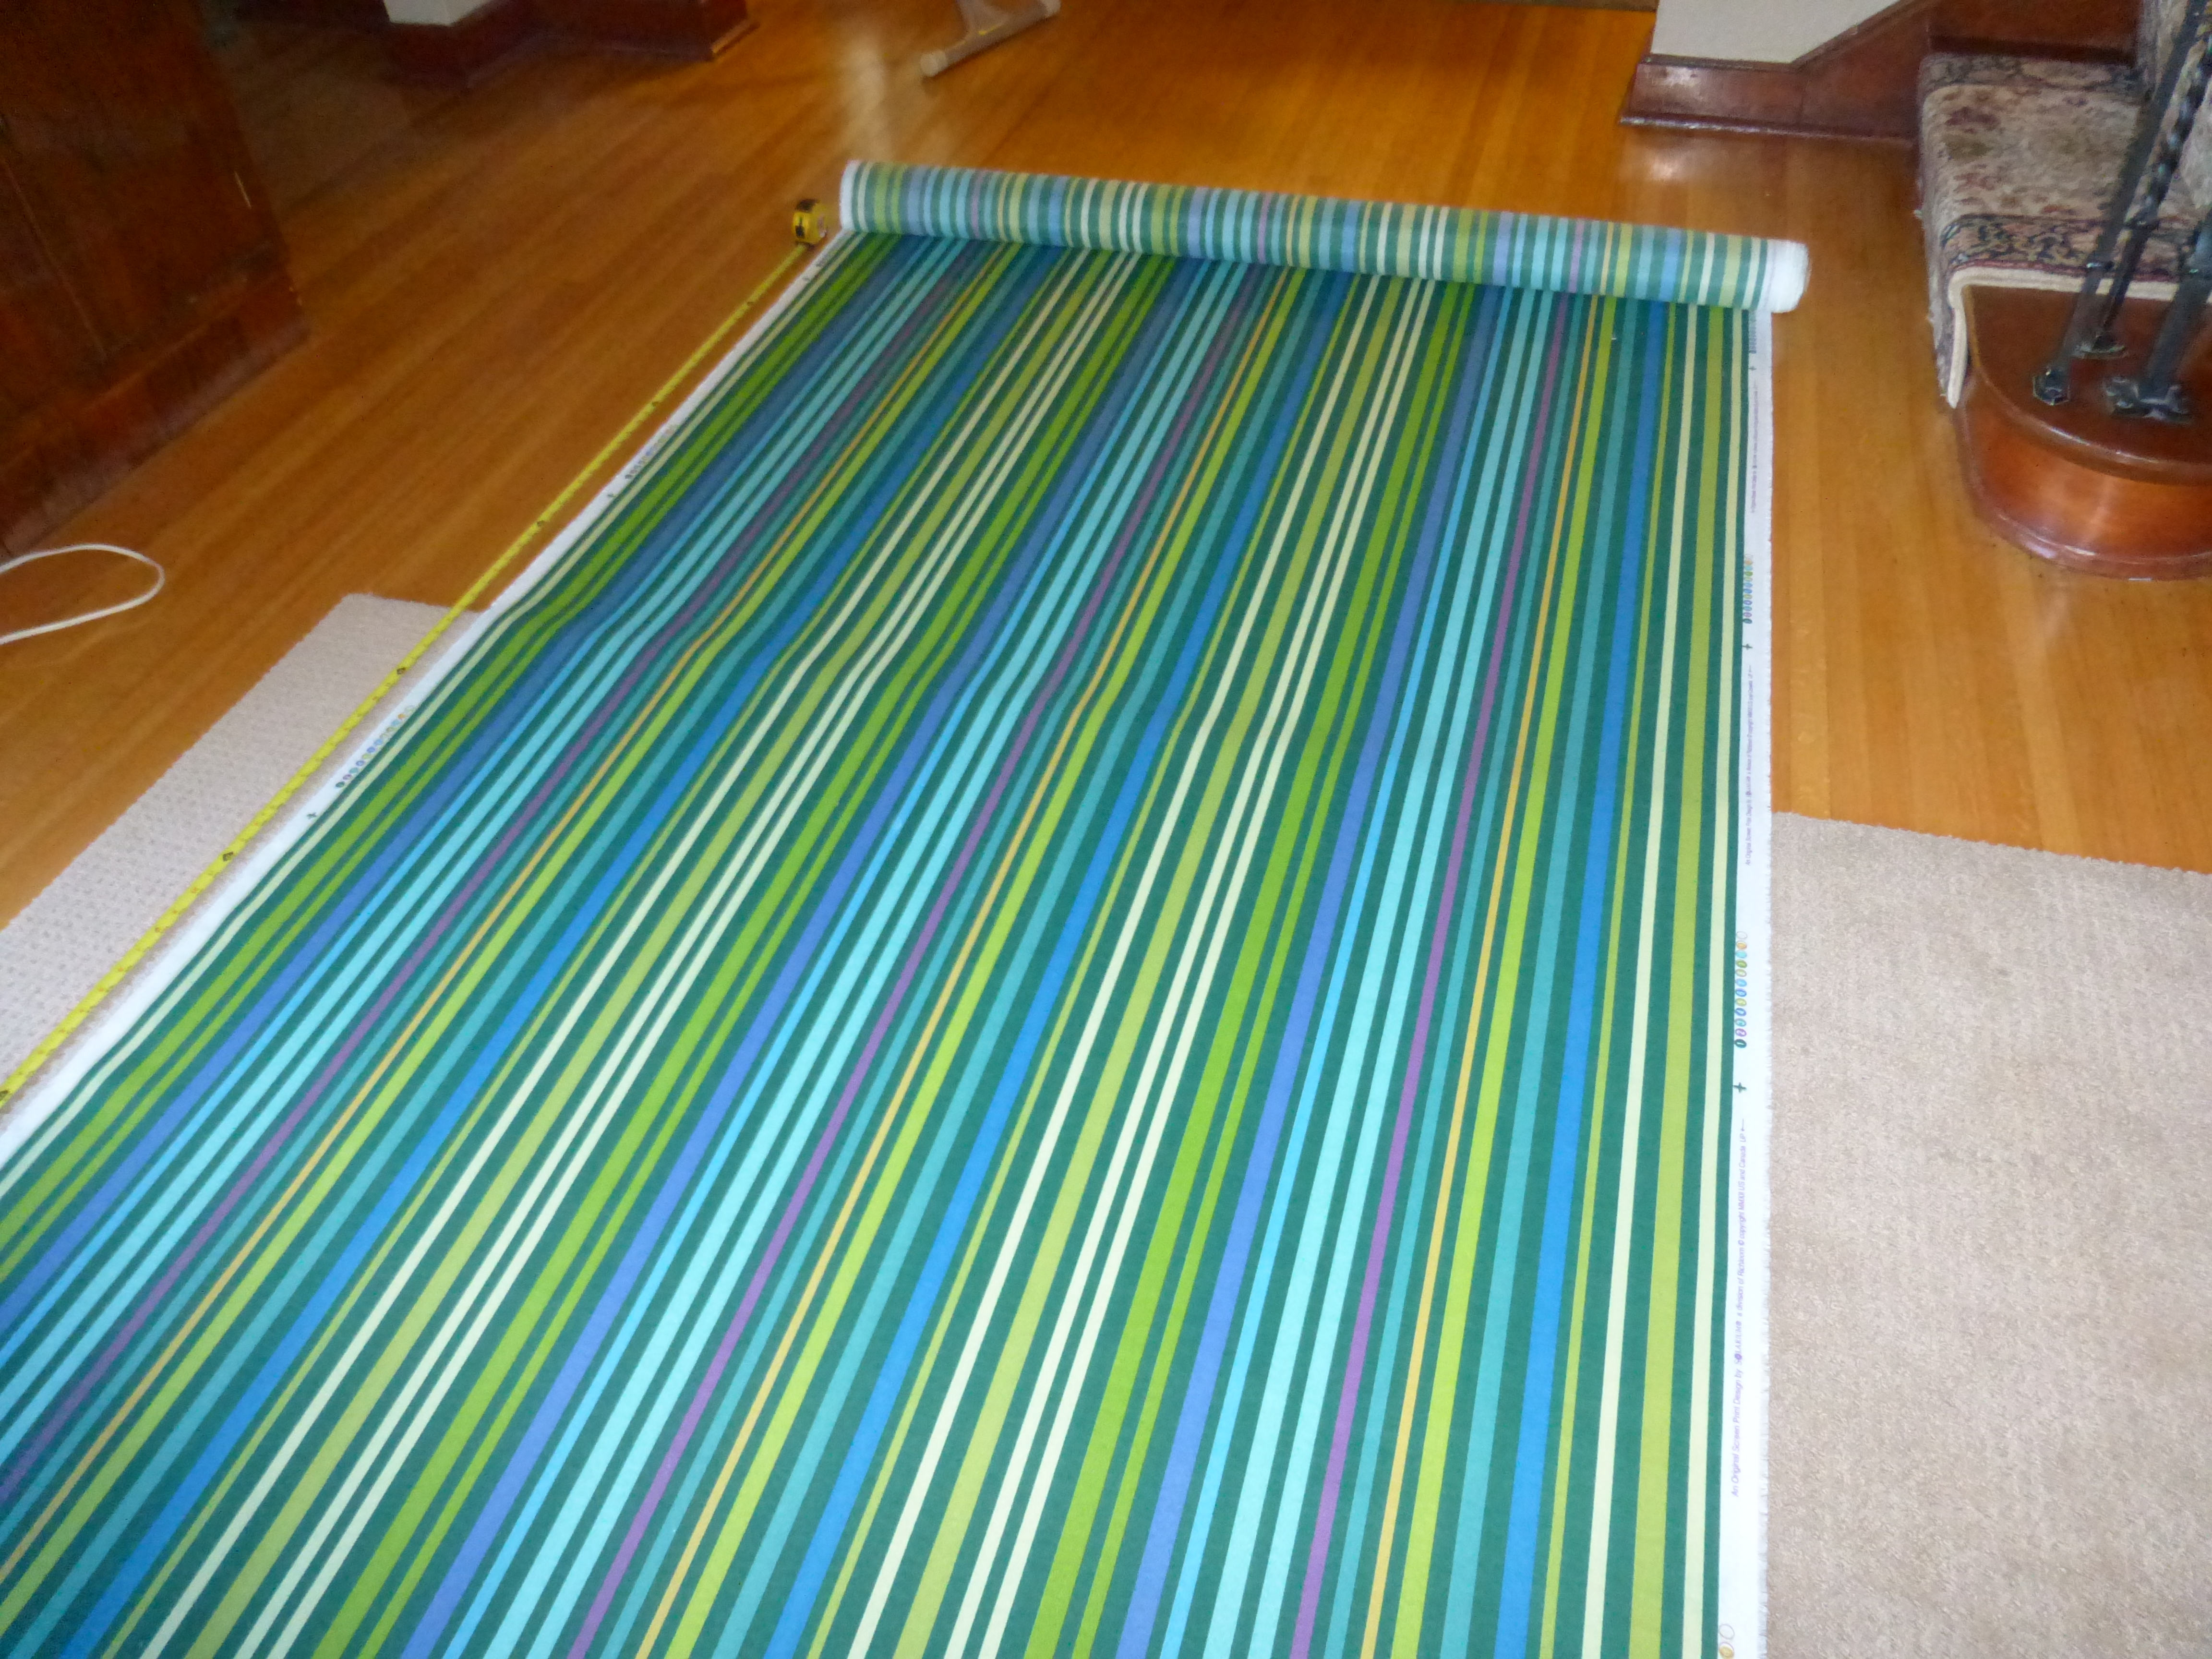
Roll Out the Fabric
Roll out your fabric and start cutting! My fabric was 55″ wide and I used 3 lengths of it. Each piece was 7′ 6″ long….approximately. Ok. I eyeballed it, but it worked out.
Here is the French Seam Part:
Begin by pinning wrong sides together:

Pin Wrong Sides Together
Sew with a 1/2″ Seam Allowance:

Sew together with 1/2″ Seam Allowance
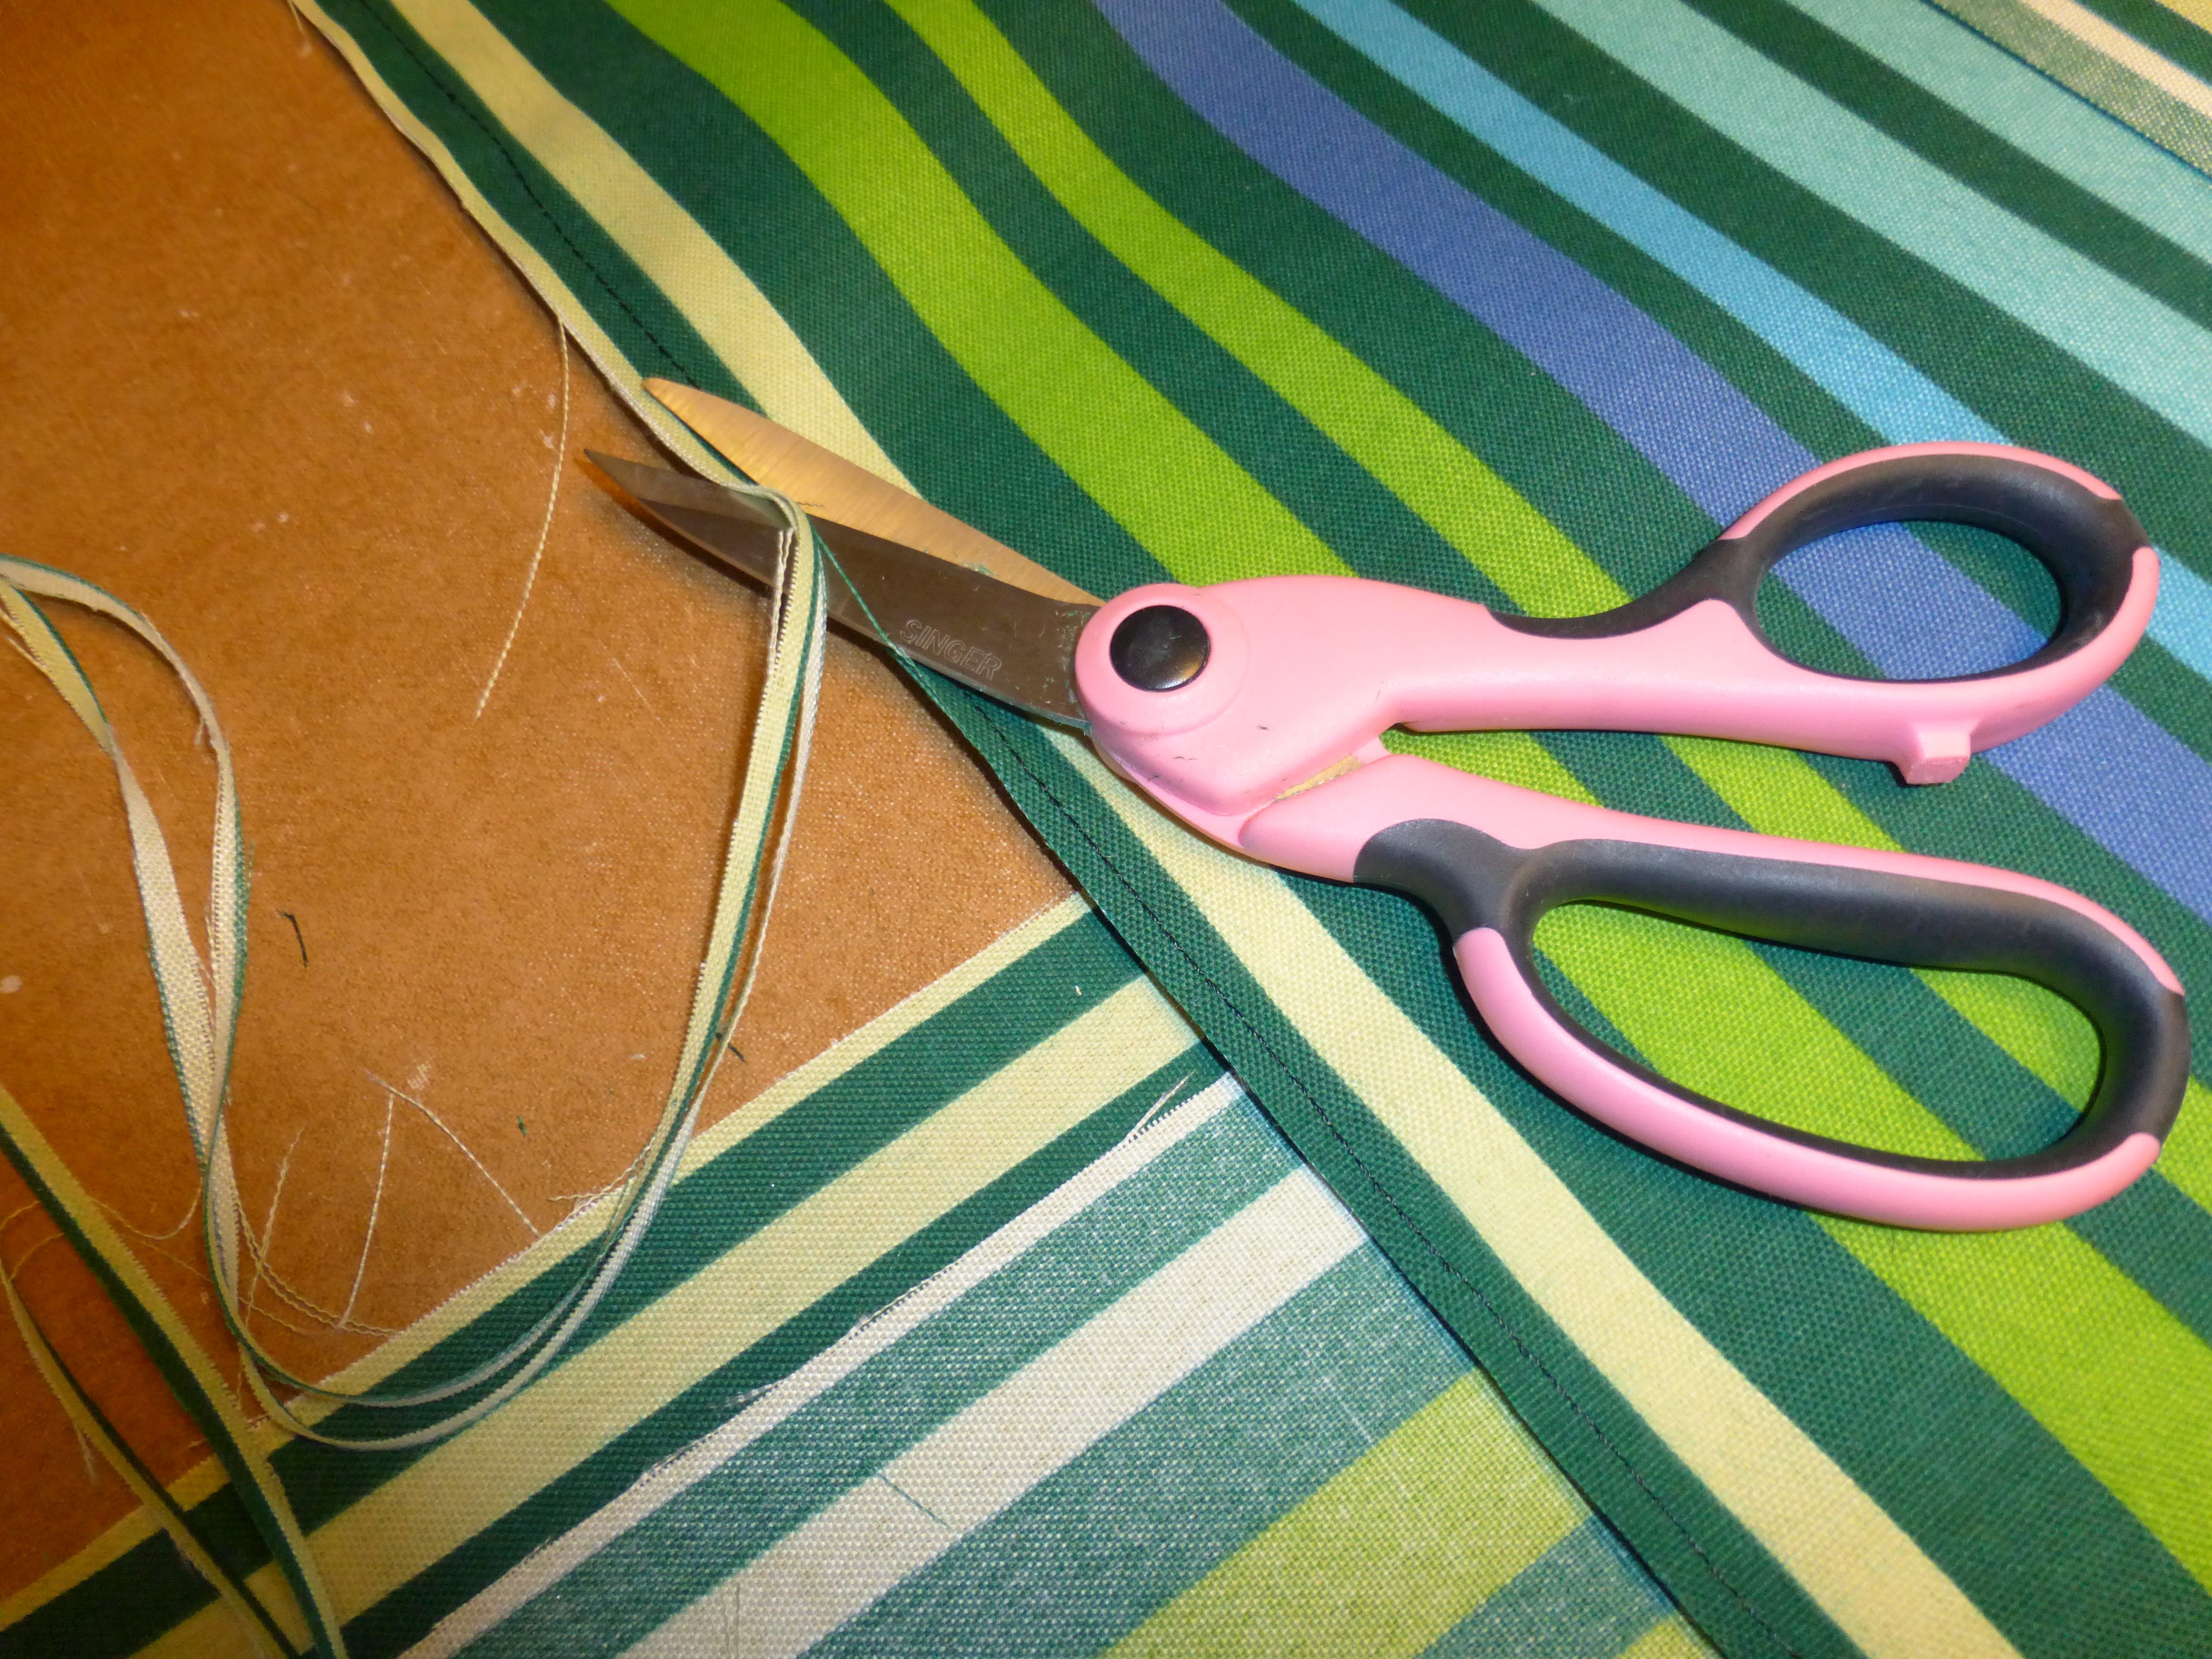
Trim the seam to about 1/4″ – 1/8″:
Trim Seam Allowance
Fold with Right Sides together and press and pin:

Fold Right Sides together and Press and Pin
Sew along this pinned seam with 1/2″ Seam Allowance:
Sew pinned seam with 1/2″ Seam Allowance
The result is a neat and tidy seam with no frayed edges. And it is STRONG! I stitch this tag-like seam down flat so it looks more finished:

Stitch down french seam

French Seam
There! You have mastered a French Seam! Now if you are using more than 2 widths of fabric, you’ll have to do it again. The 2nd time is much easier, I promise.
This is what we have so far:
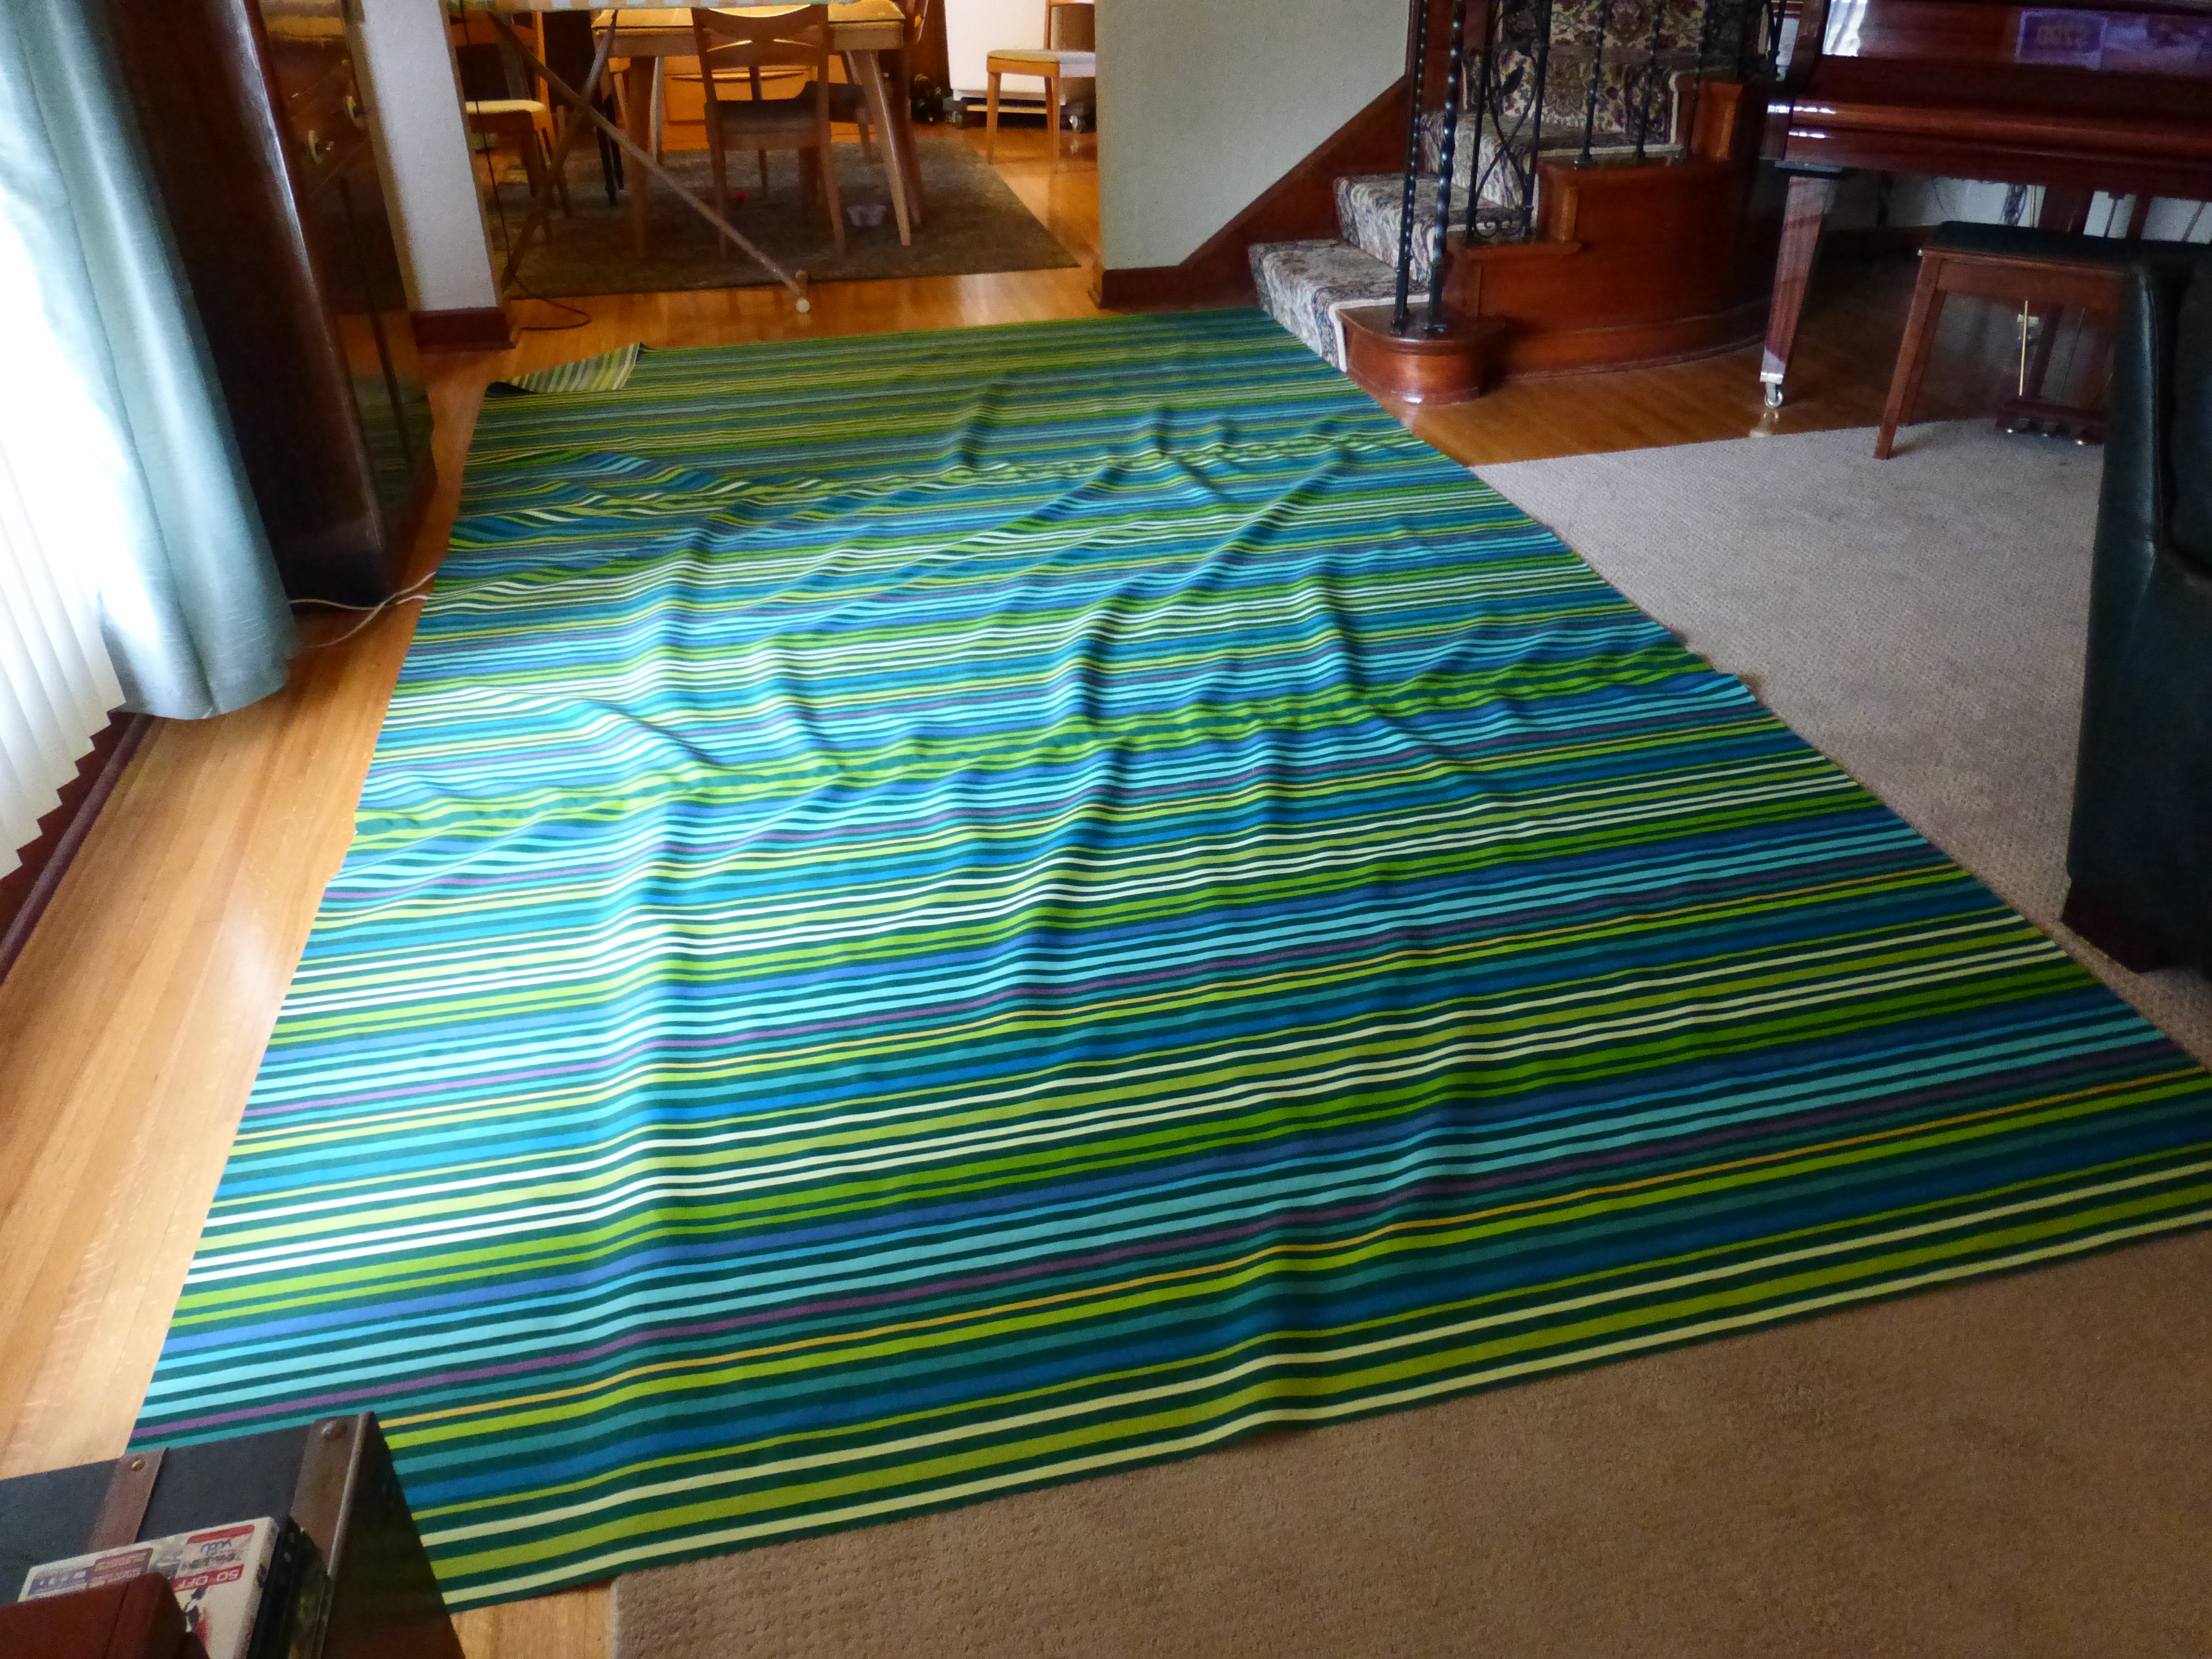
Wow! That’s a huge awning!
If you’ve gotten this far, then you deserve a break and a cocktail. If you have a significant other they should take you to dinner. If you don’t, take yourself to dinner. You’ve been busy and deserve it.
Now we get to cut more fabric. Measure the length and width of your awning. Cut the side pieces – these are the pieces that hang down and are scalloped. Be sure to add in your seam allowance. It is a mathematical odyssey of the mind. I don’t know how I make the measurements work, but they do. Obviously, I have some mathematical limitations otherwise I could explain it to you. Refer to my Disclaimer above. My side scalloped pieces were 8″ long. I sewed them with a 1/2″ seam allowance, so the drop is 7.5″ (Impressed?!). That sounded really smart. Sew the side pieces together so they match the measurements of the side and front of the awning. You will have 3 pieces: 1 for each side (shorter), and 1 for the front (longer).
Here we go:
Here are the sides. I made a template for the scallop I wanted, traced around it, then cut:

Scalloped Edge
Now the pain in the butt part: Sew the binding to your scalloped edge using a zig zag stitch. The problem is the tight “V” at the top of each scallop. It is just really hard to sew the binding in there. I apologize in advance:
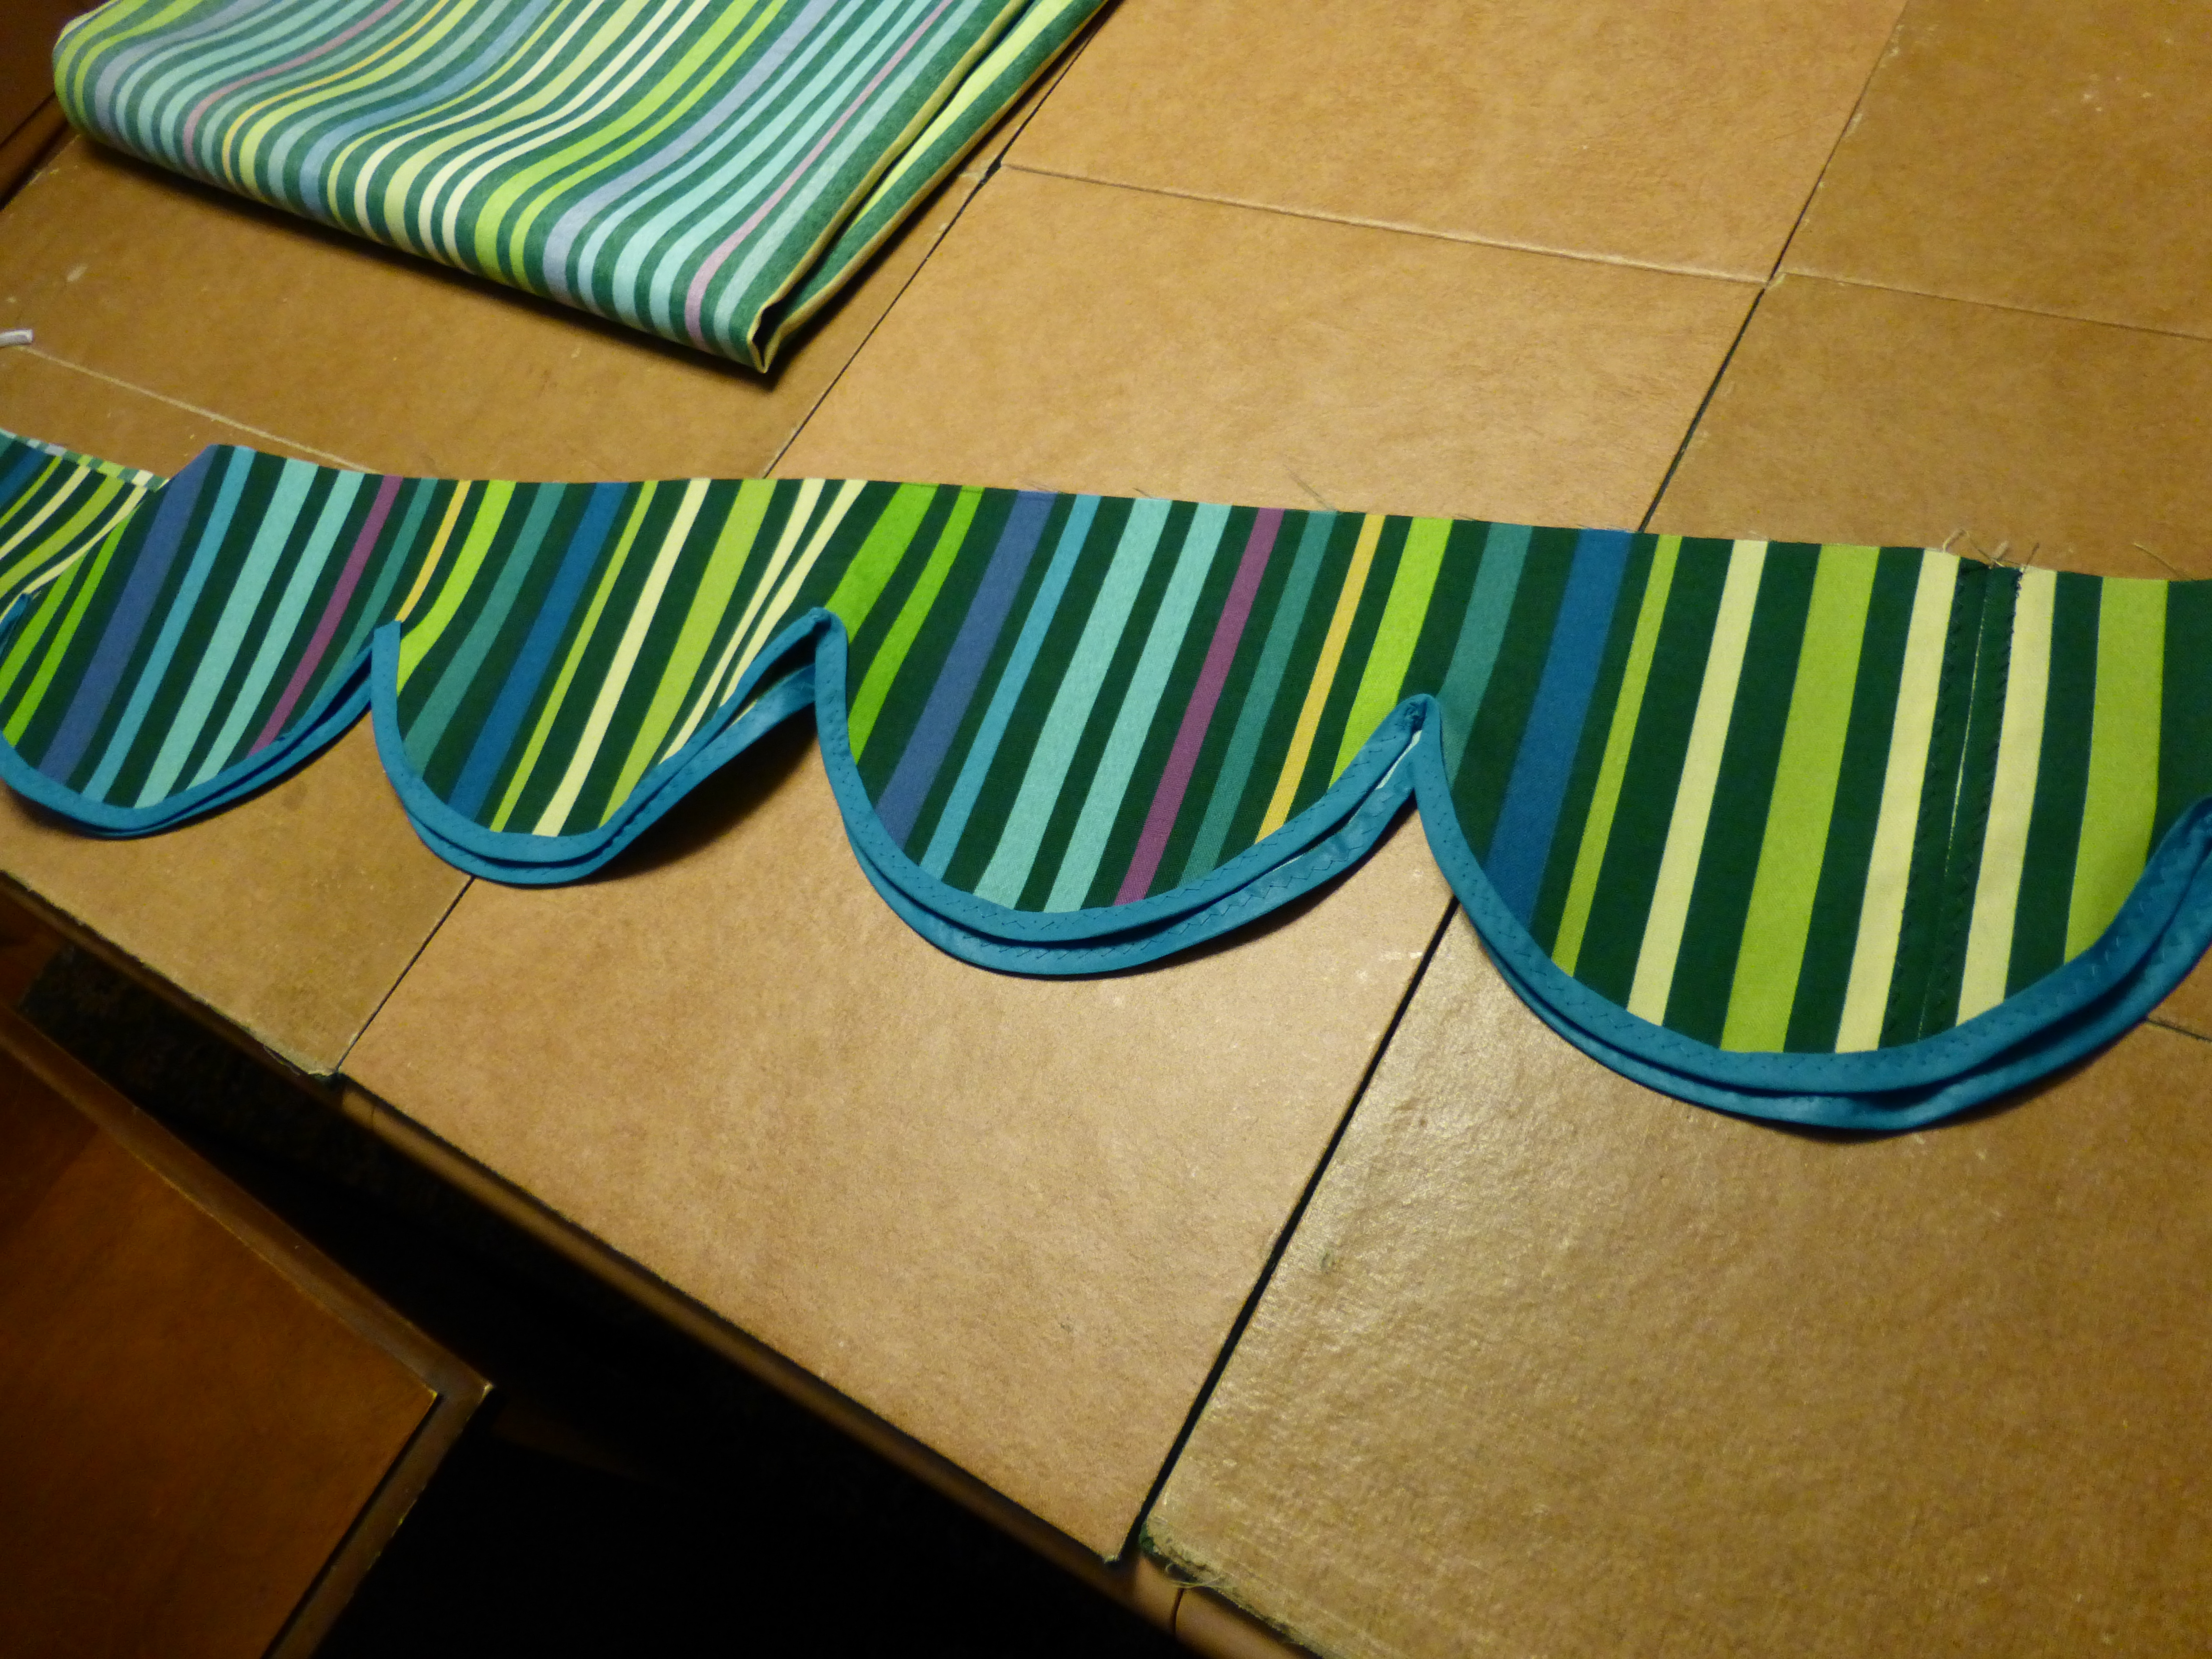
Binding on Scalloped Sides
Now lay out your awning on the floor and pin the long front scalloped piece on to the front of your awning. WRONG SIDES TOGETHER. I know that seems weird, but you will see why in the next step.
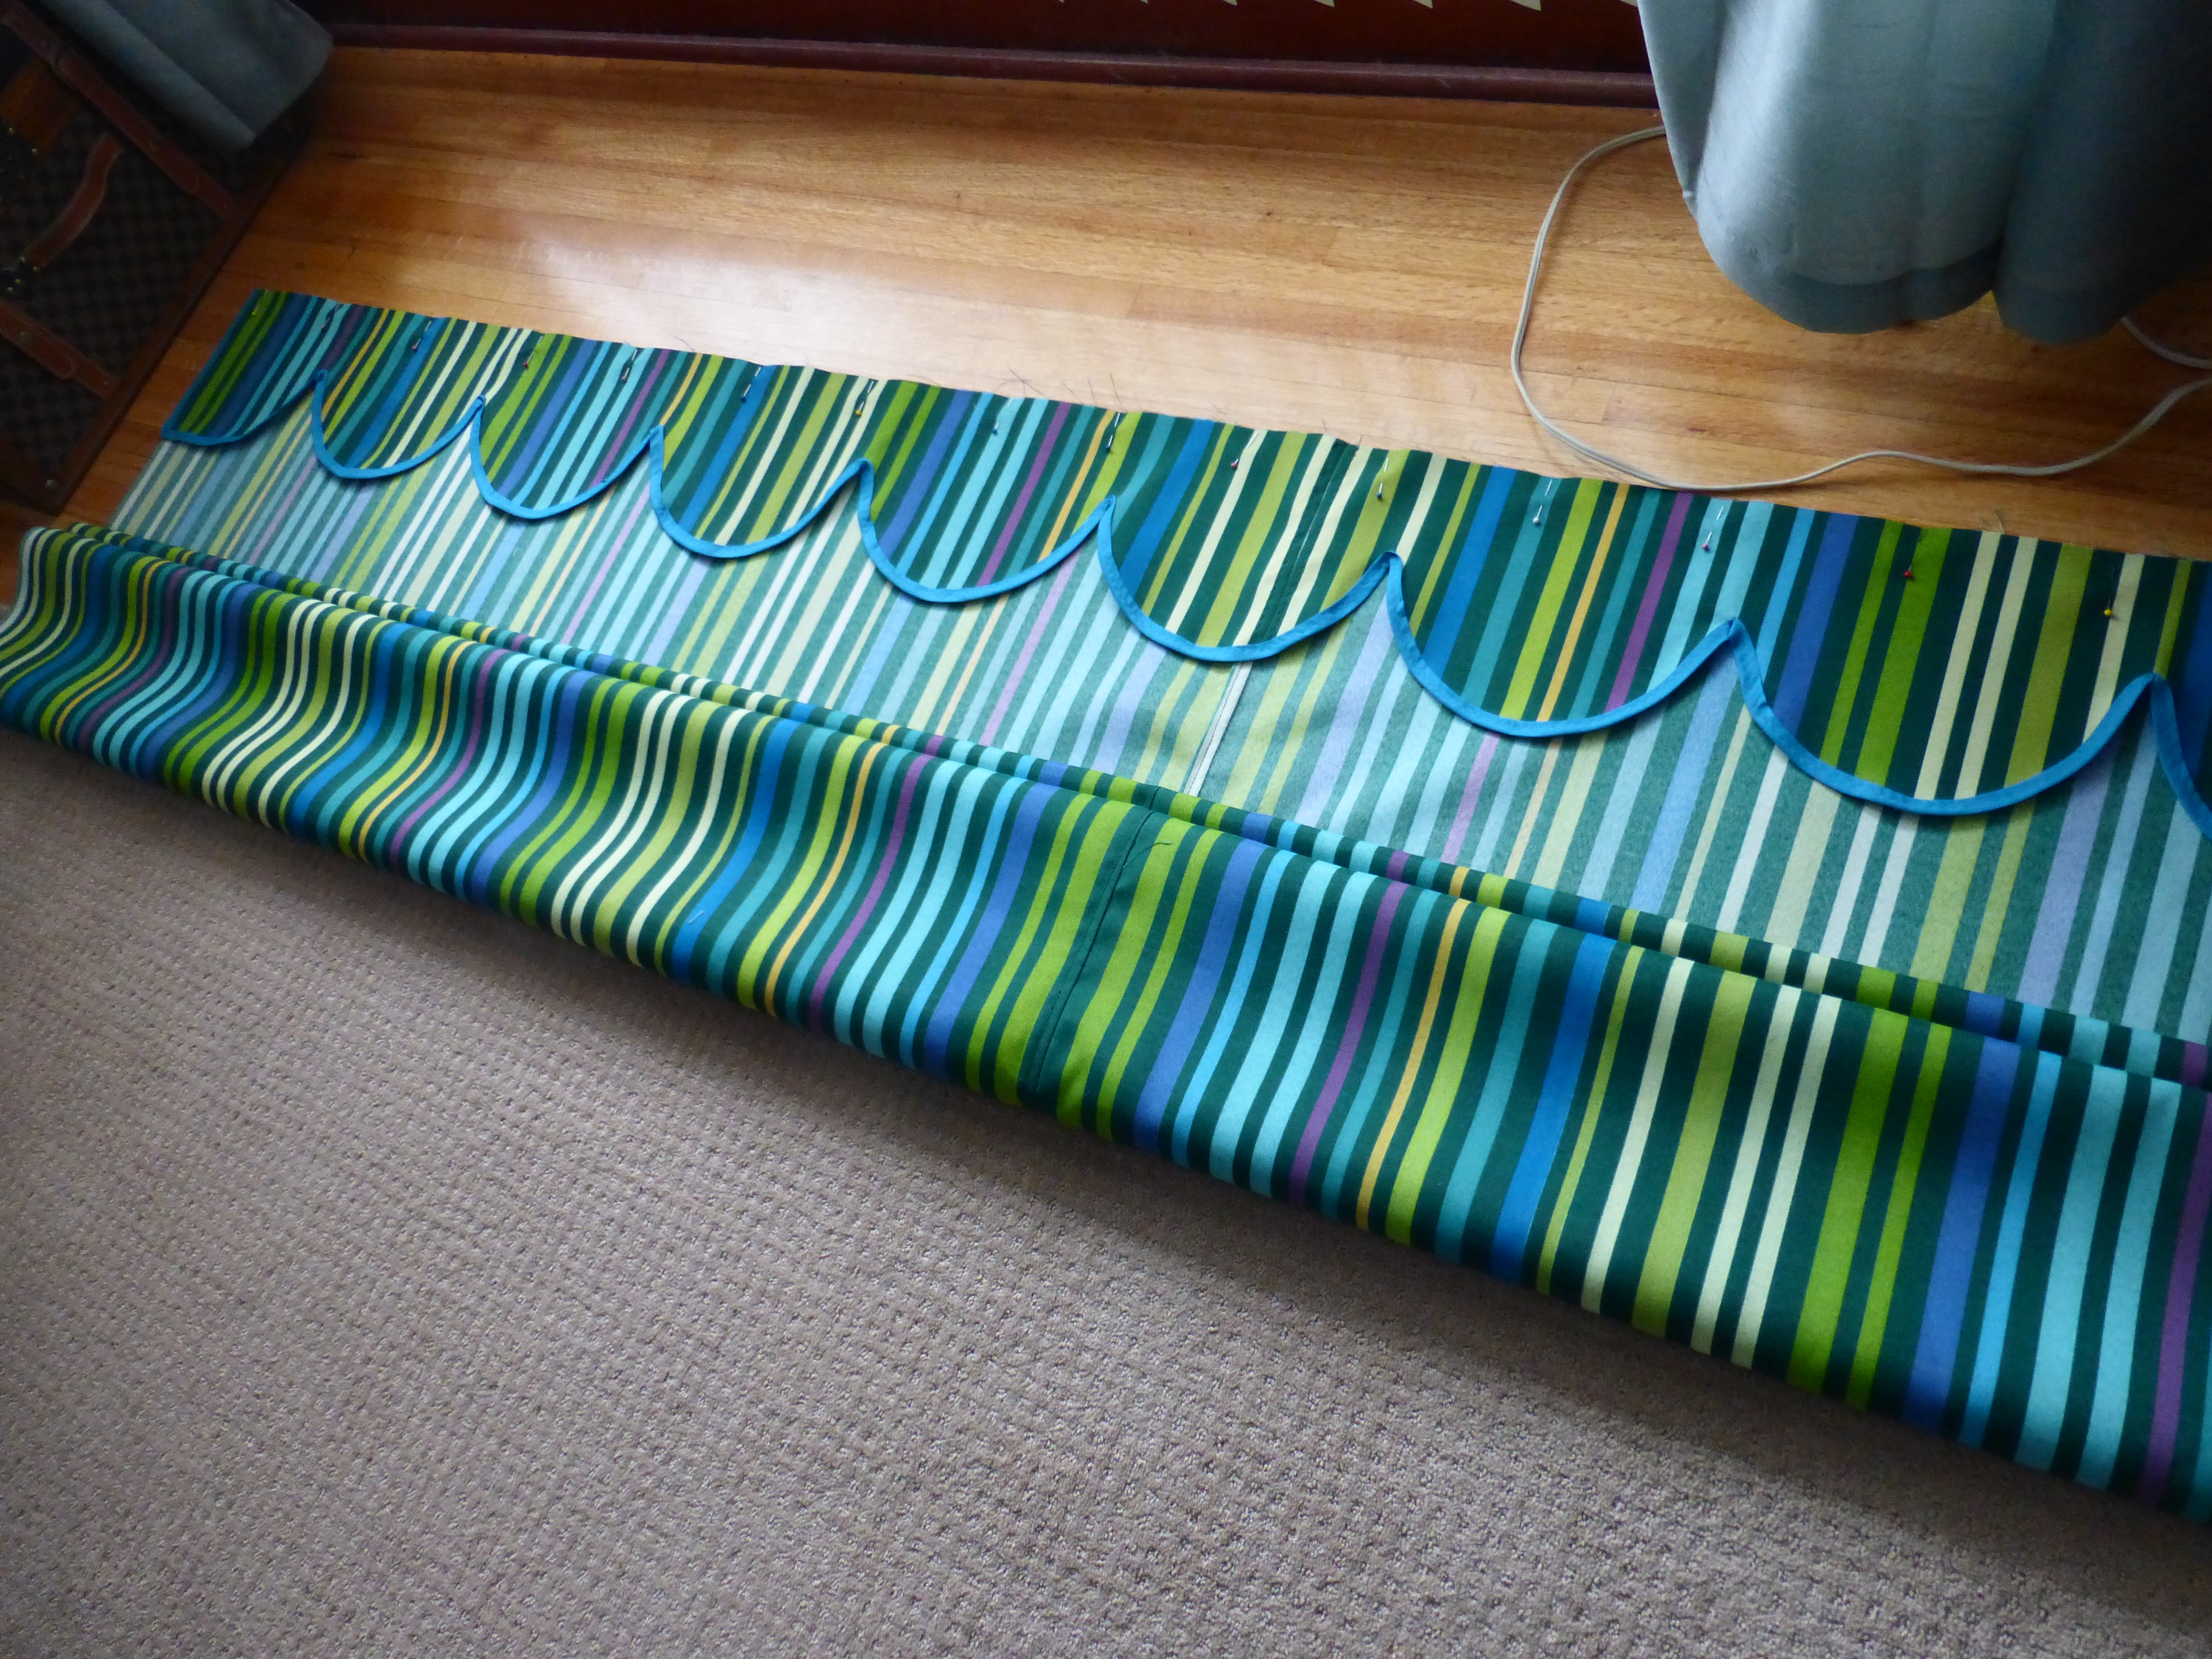
Pin Scalloped Edge to Front of Awning. WRONG SIDES TOGETHER
Sew this piece on using a 1/2″ seam allowance:
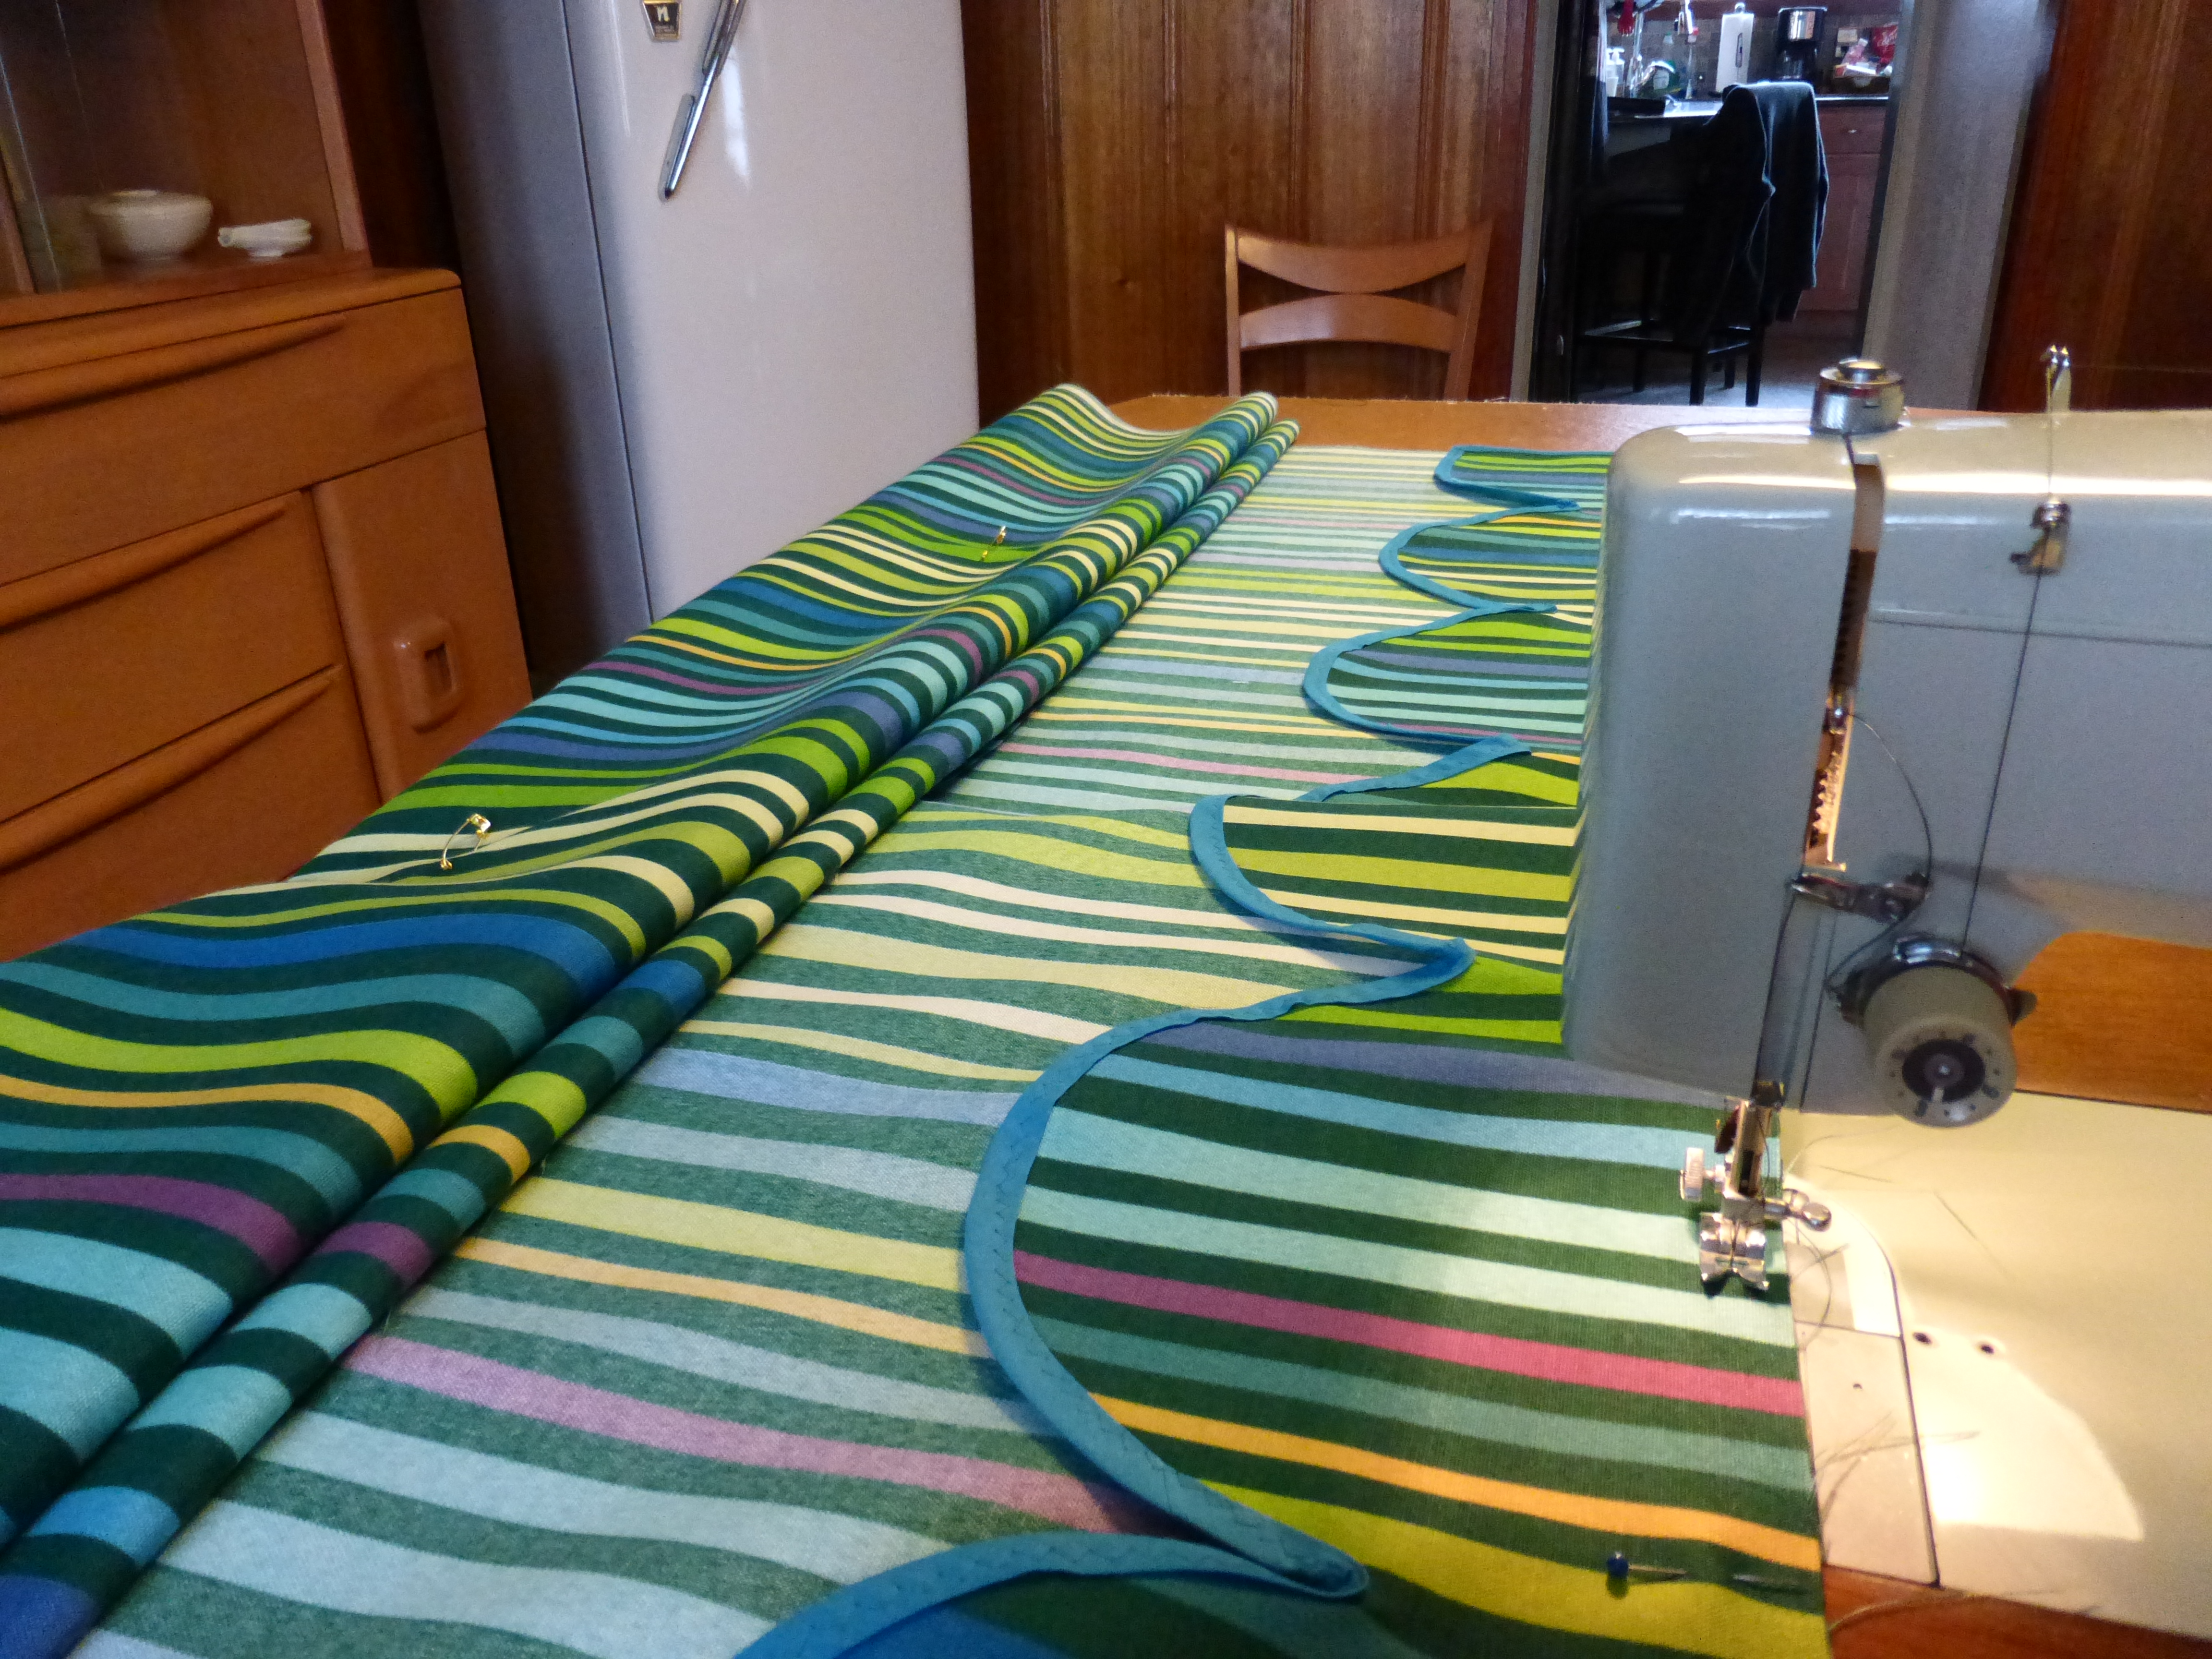
Sew scalloped edge on with 1/2″ Seam Allowance
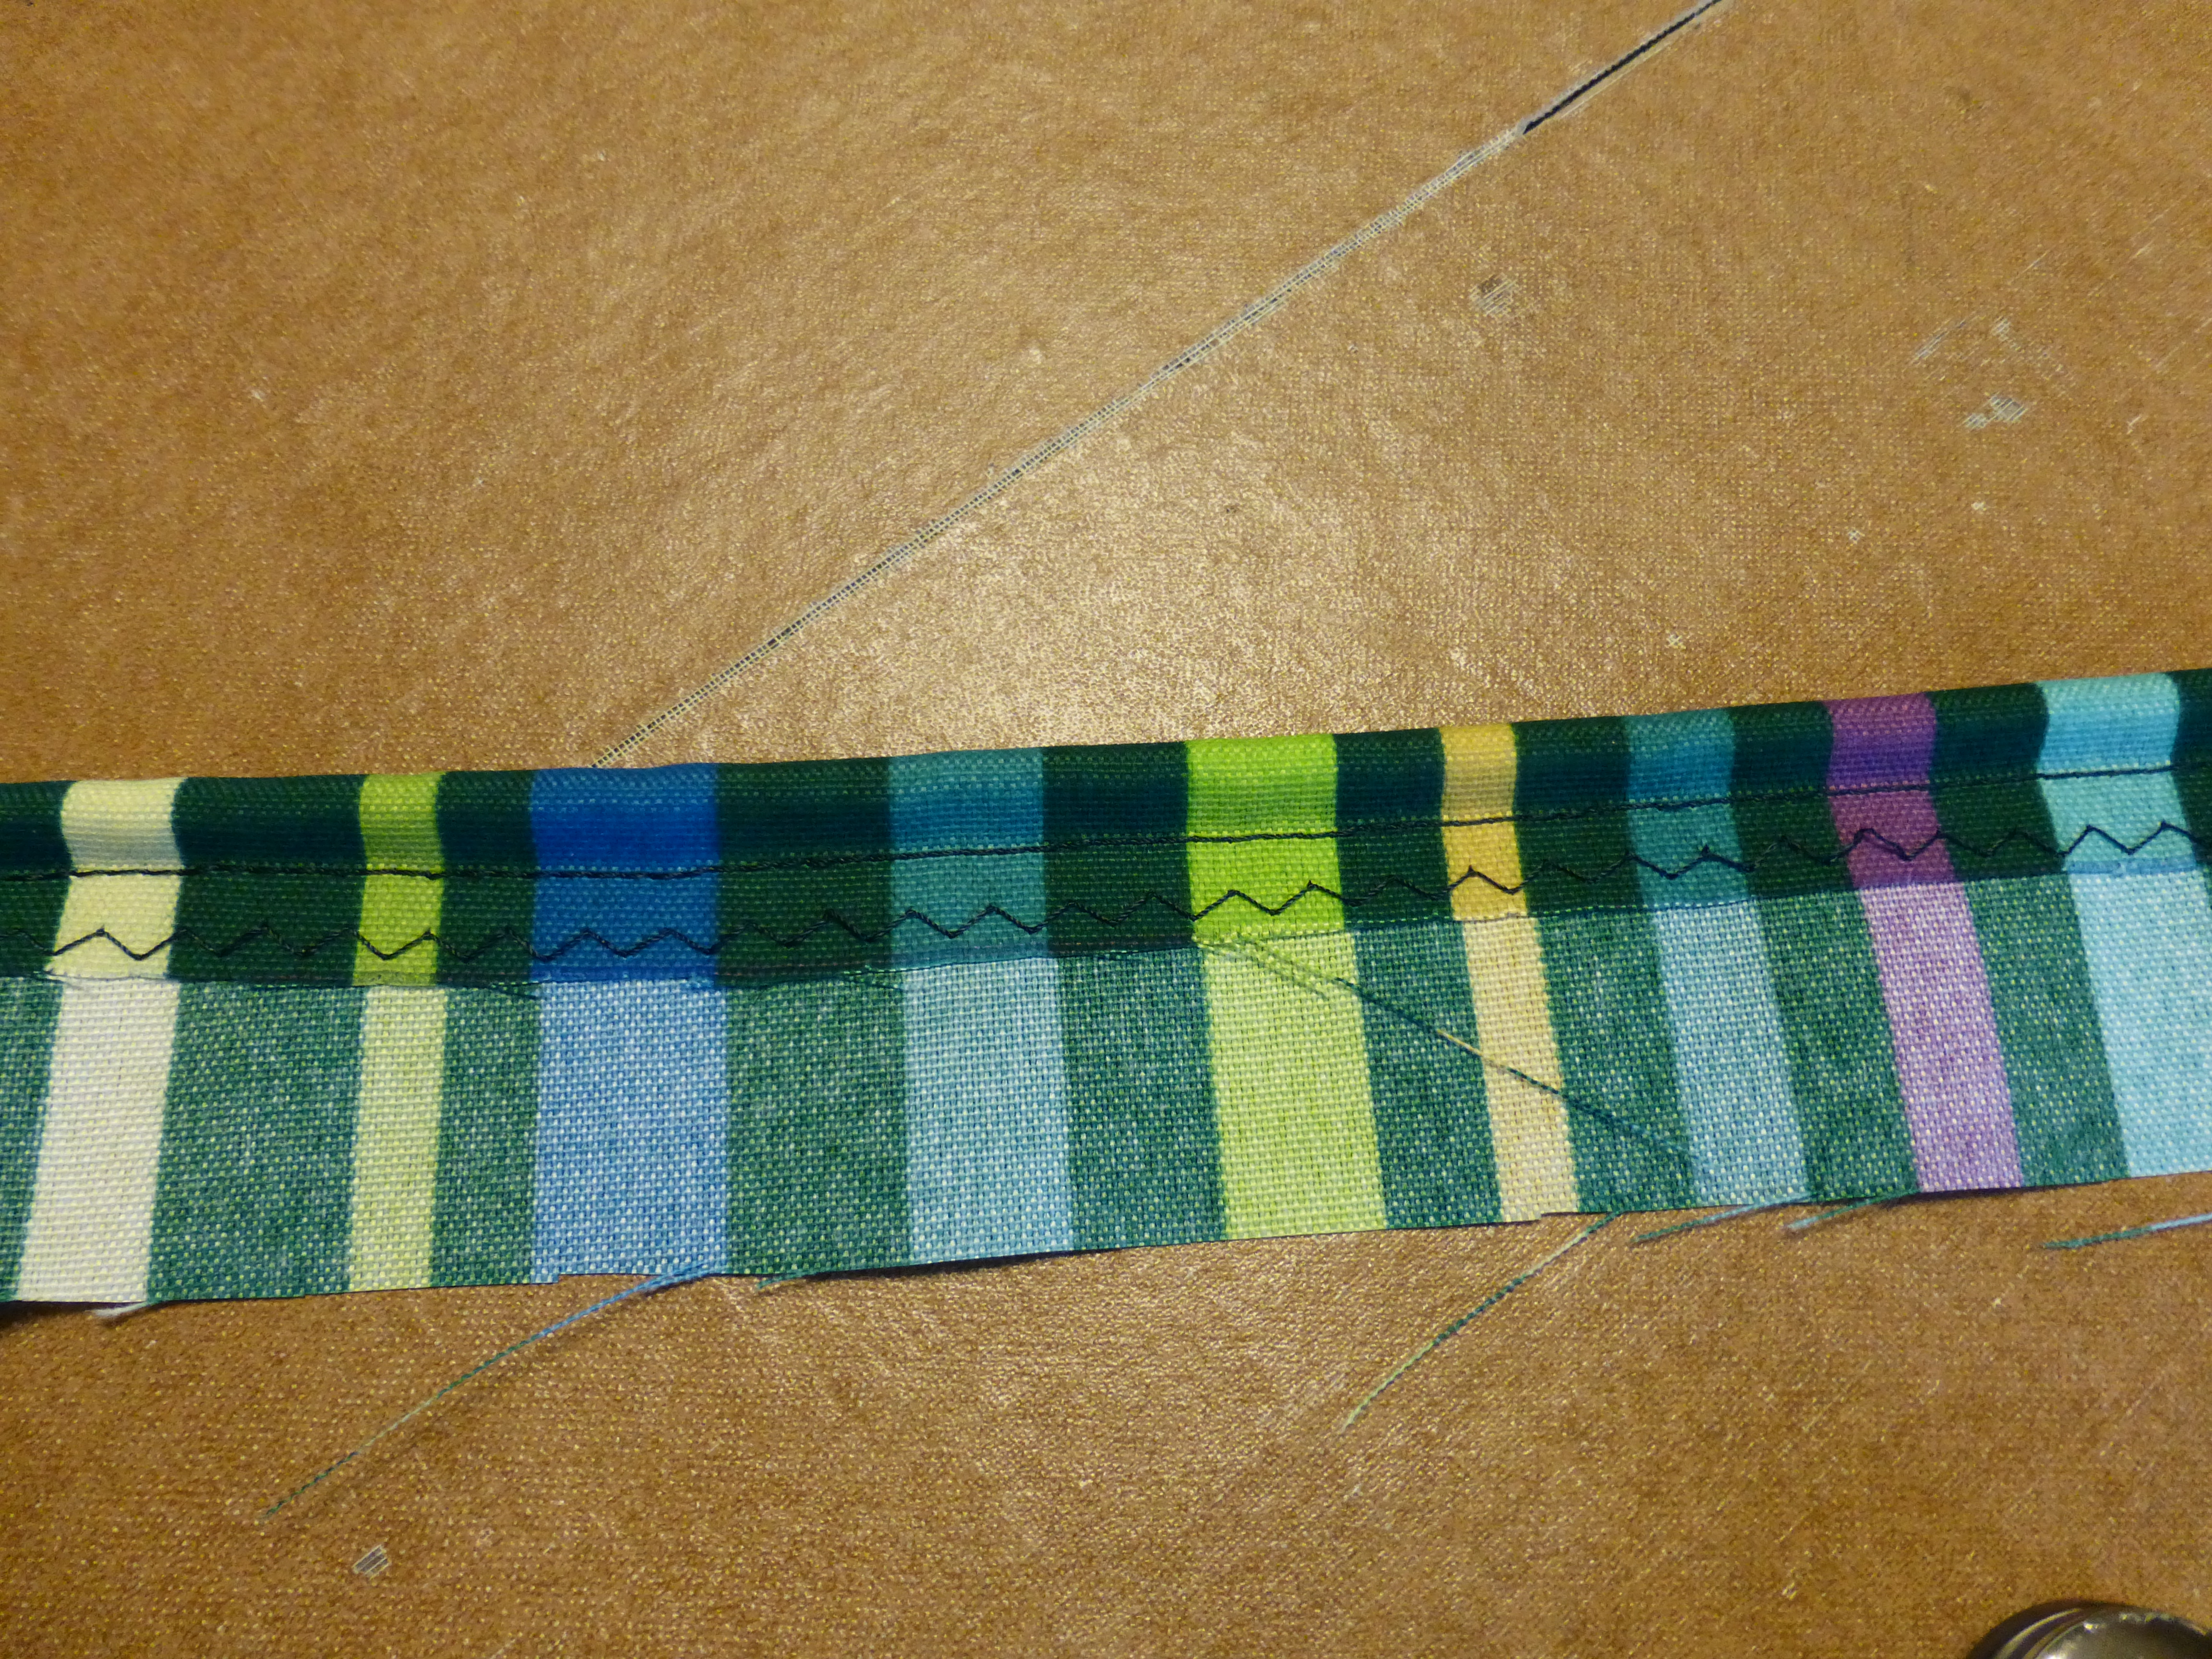
Now stitch the binding tape along the unfinished edge of seam. It seals the frayed edge and looks nice and neat:

Sew Binding Tape along unfinished edge of seam
Doesn’t that look nice?!

Finished Scalloped Edge
Now do this again on the shorter side pieces :). If you have had enough and just can’t bear the thought then don’t put the side pieces on. I’ve seen a lot of awnings with just the front piece attached. They still look great.
TIME FOR ANOTHER BREAK! Get yourself a strong cocktail and order take-out.
Now we make the Awning Rope:
IF YOU ARE USING KEDER AWNING ROPE, THEN JUST SEW IT ON!
Now we will mess with the Awning Rope and Fabric. The fabric is cut in 3″ wide strips. Cut enough to cover the length of your awning + seam allowances.
The clothes line should be about 36″ longer than the awning fabric. That way you can have two 18″ “handles” coming out either side of the awning to help install it. I knotted and taped the ends of the clothes line to keep it from fraying.

Awning Rope Fabric
Fold about an inch of fabric over the rope and stitch using a zipper foot:

Fold fabric over rope and stitch with zipper foot
Finish off the piping stitch with a zig zag the entire length of fabric. I know it is redundant, but this part of the awning gets a lot of stress:
Zig Zag stitch along seam
OK. Now we will attach this piece to the awning! Lay out your awning fabric and pin this to it with RIGHT SIDES TOGETHER:

Pin rope piece to awning fabric
Stitch with a 1/2″ seam allowance and then cover unfinished edge of fabric with binding tape using a zig zag stitch:

Sew binding tape over unfinished edge of seam
Guess WHAT?!?!?!? You are almost completely finished!
The last thing to do is put the grommets on. You can buy a complete kit at Walmart for a few bucks.

Grommet kit and ugly hammer
First of all, sew a piece of fabric on the wrong side of awning where each grommet will go. My awning will have 3 grommet holes because it is so long. A smaller awning would be fine with 2 grommet holes on each end. Put the grommets as close as you can to the corner and edge of the fabric.
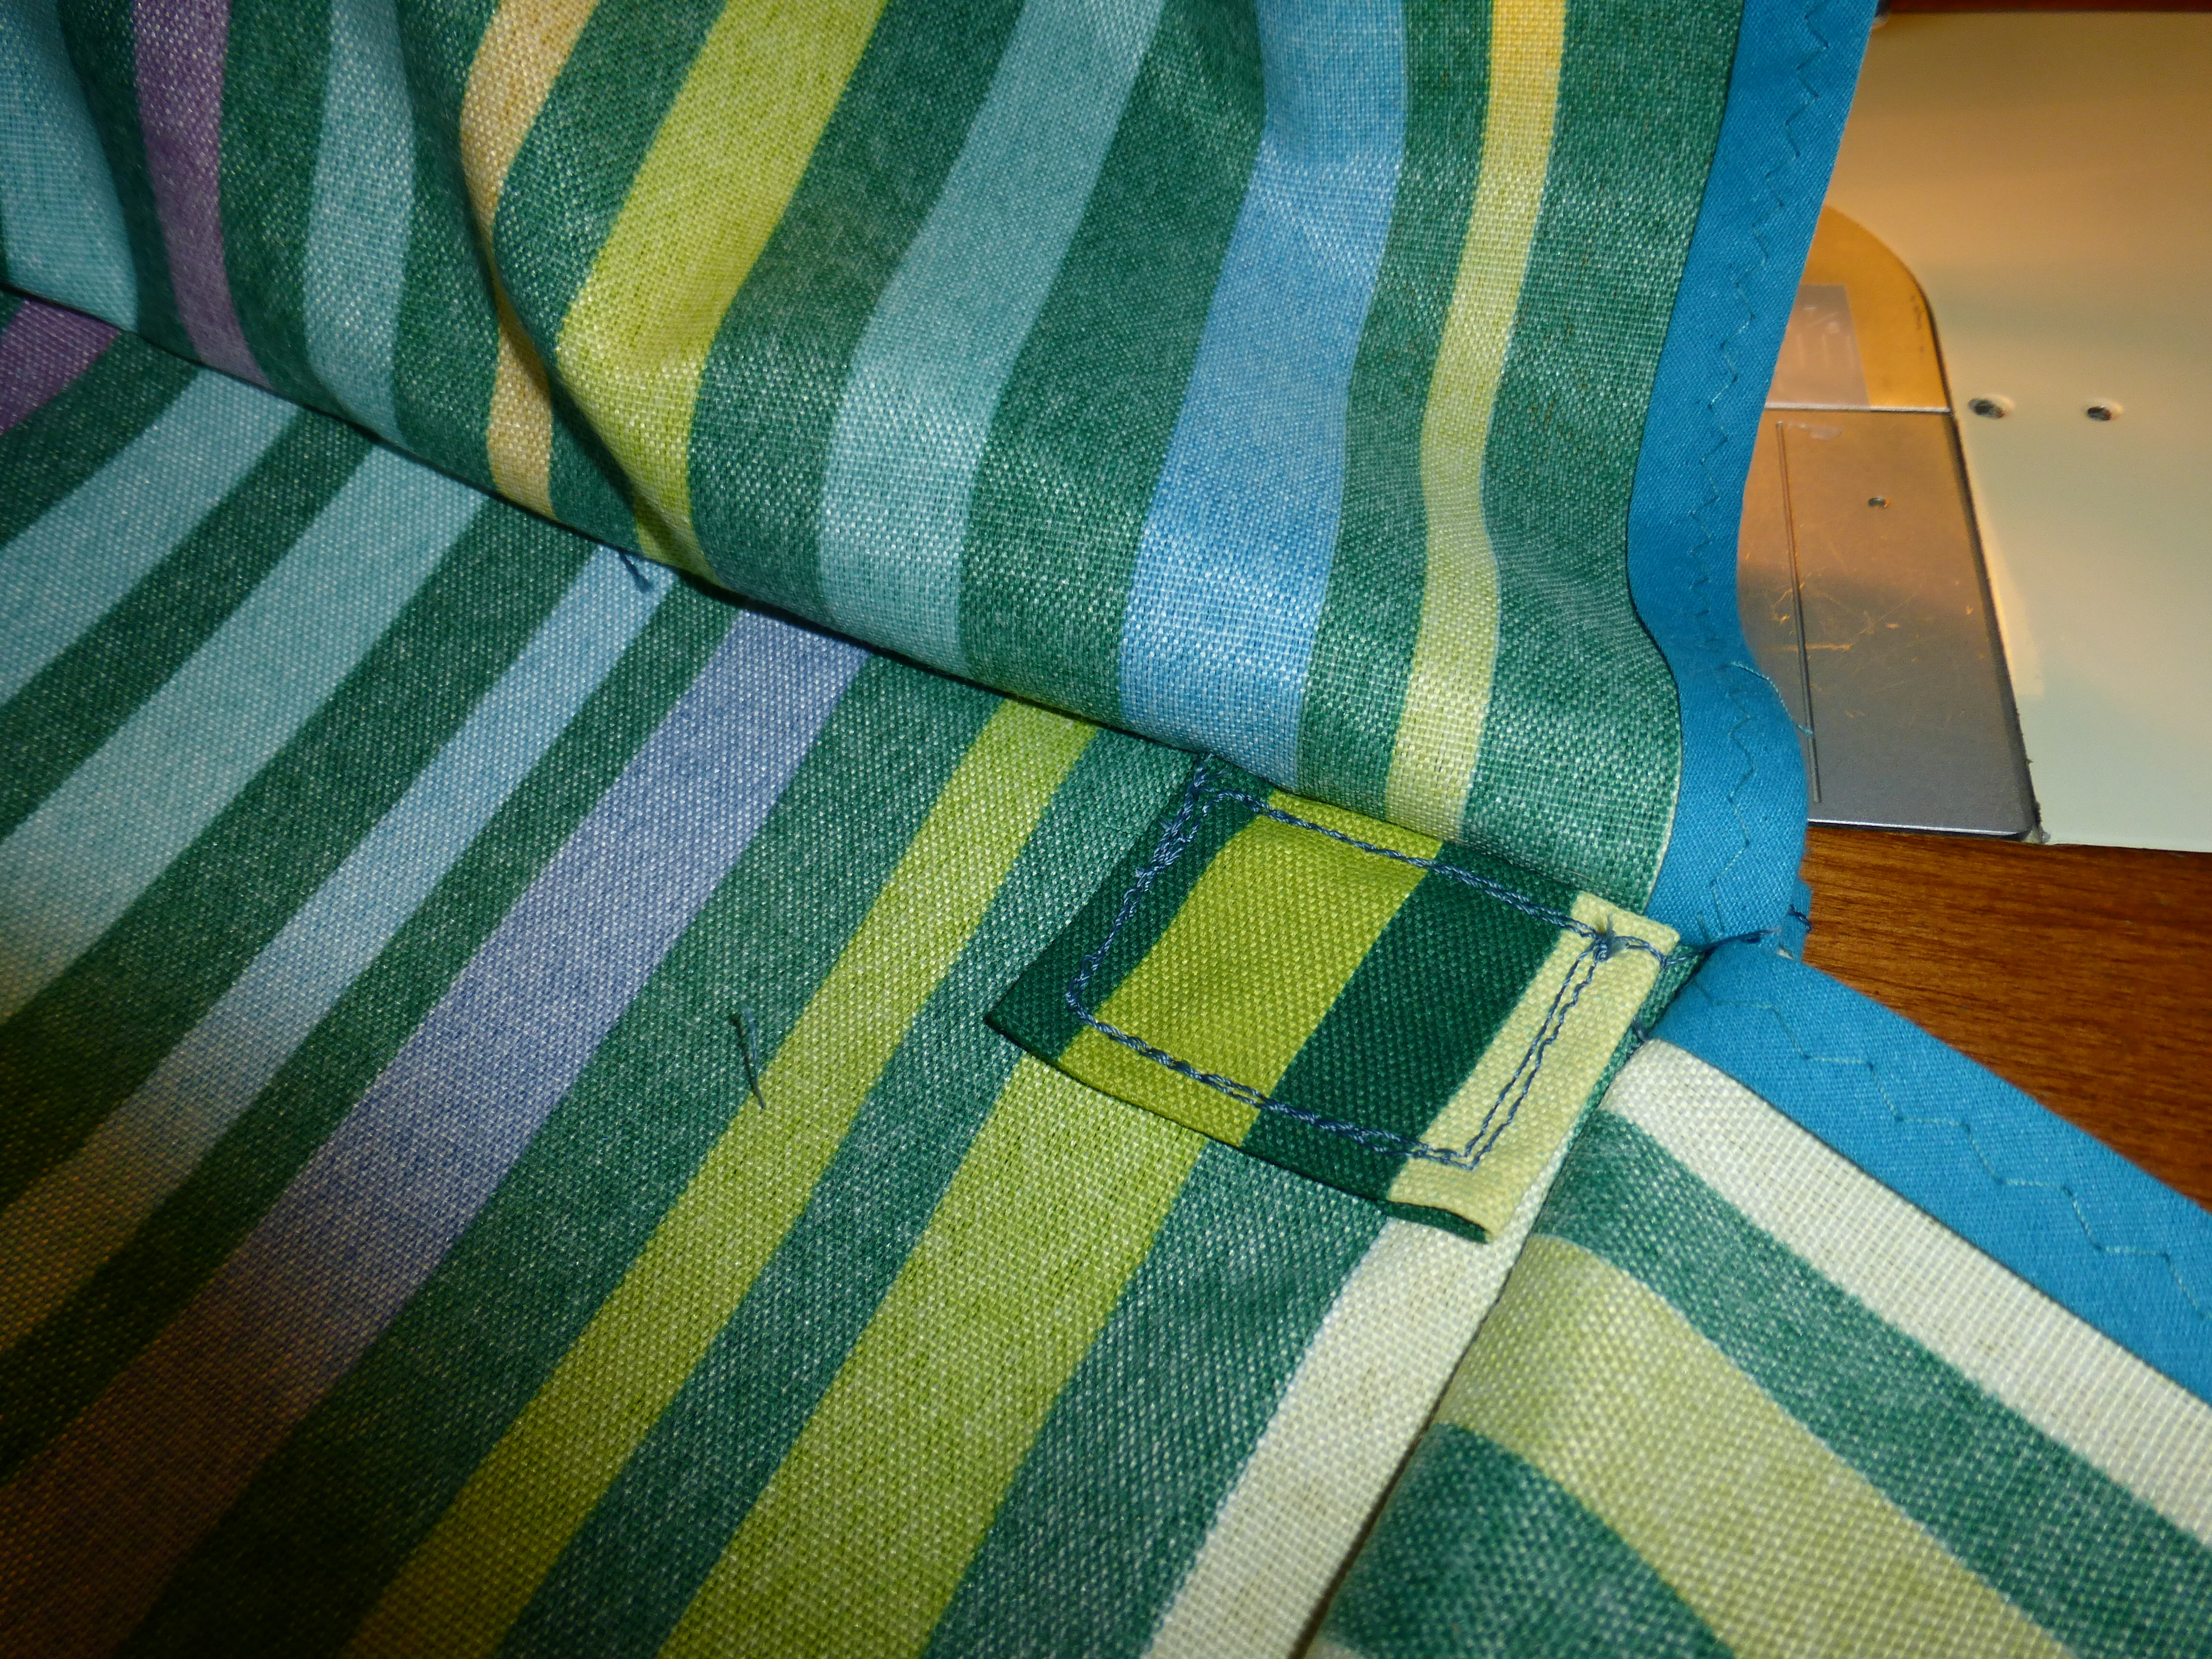
Sew on reinforcing pieces of fabric where the grommets will go
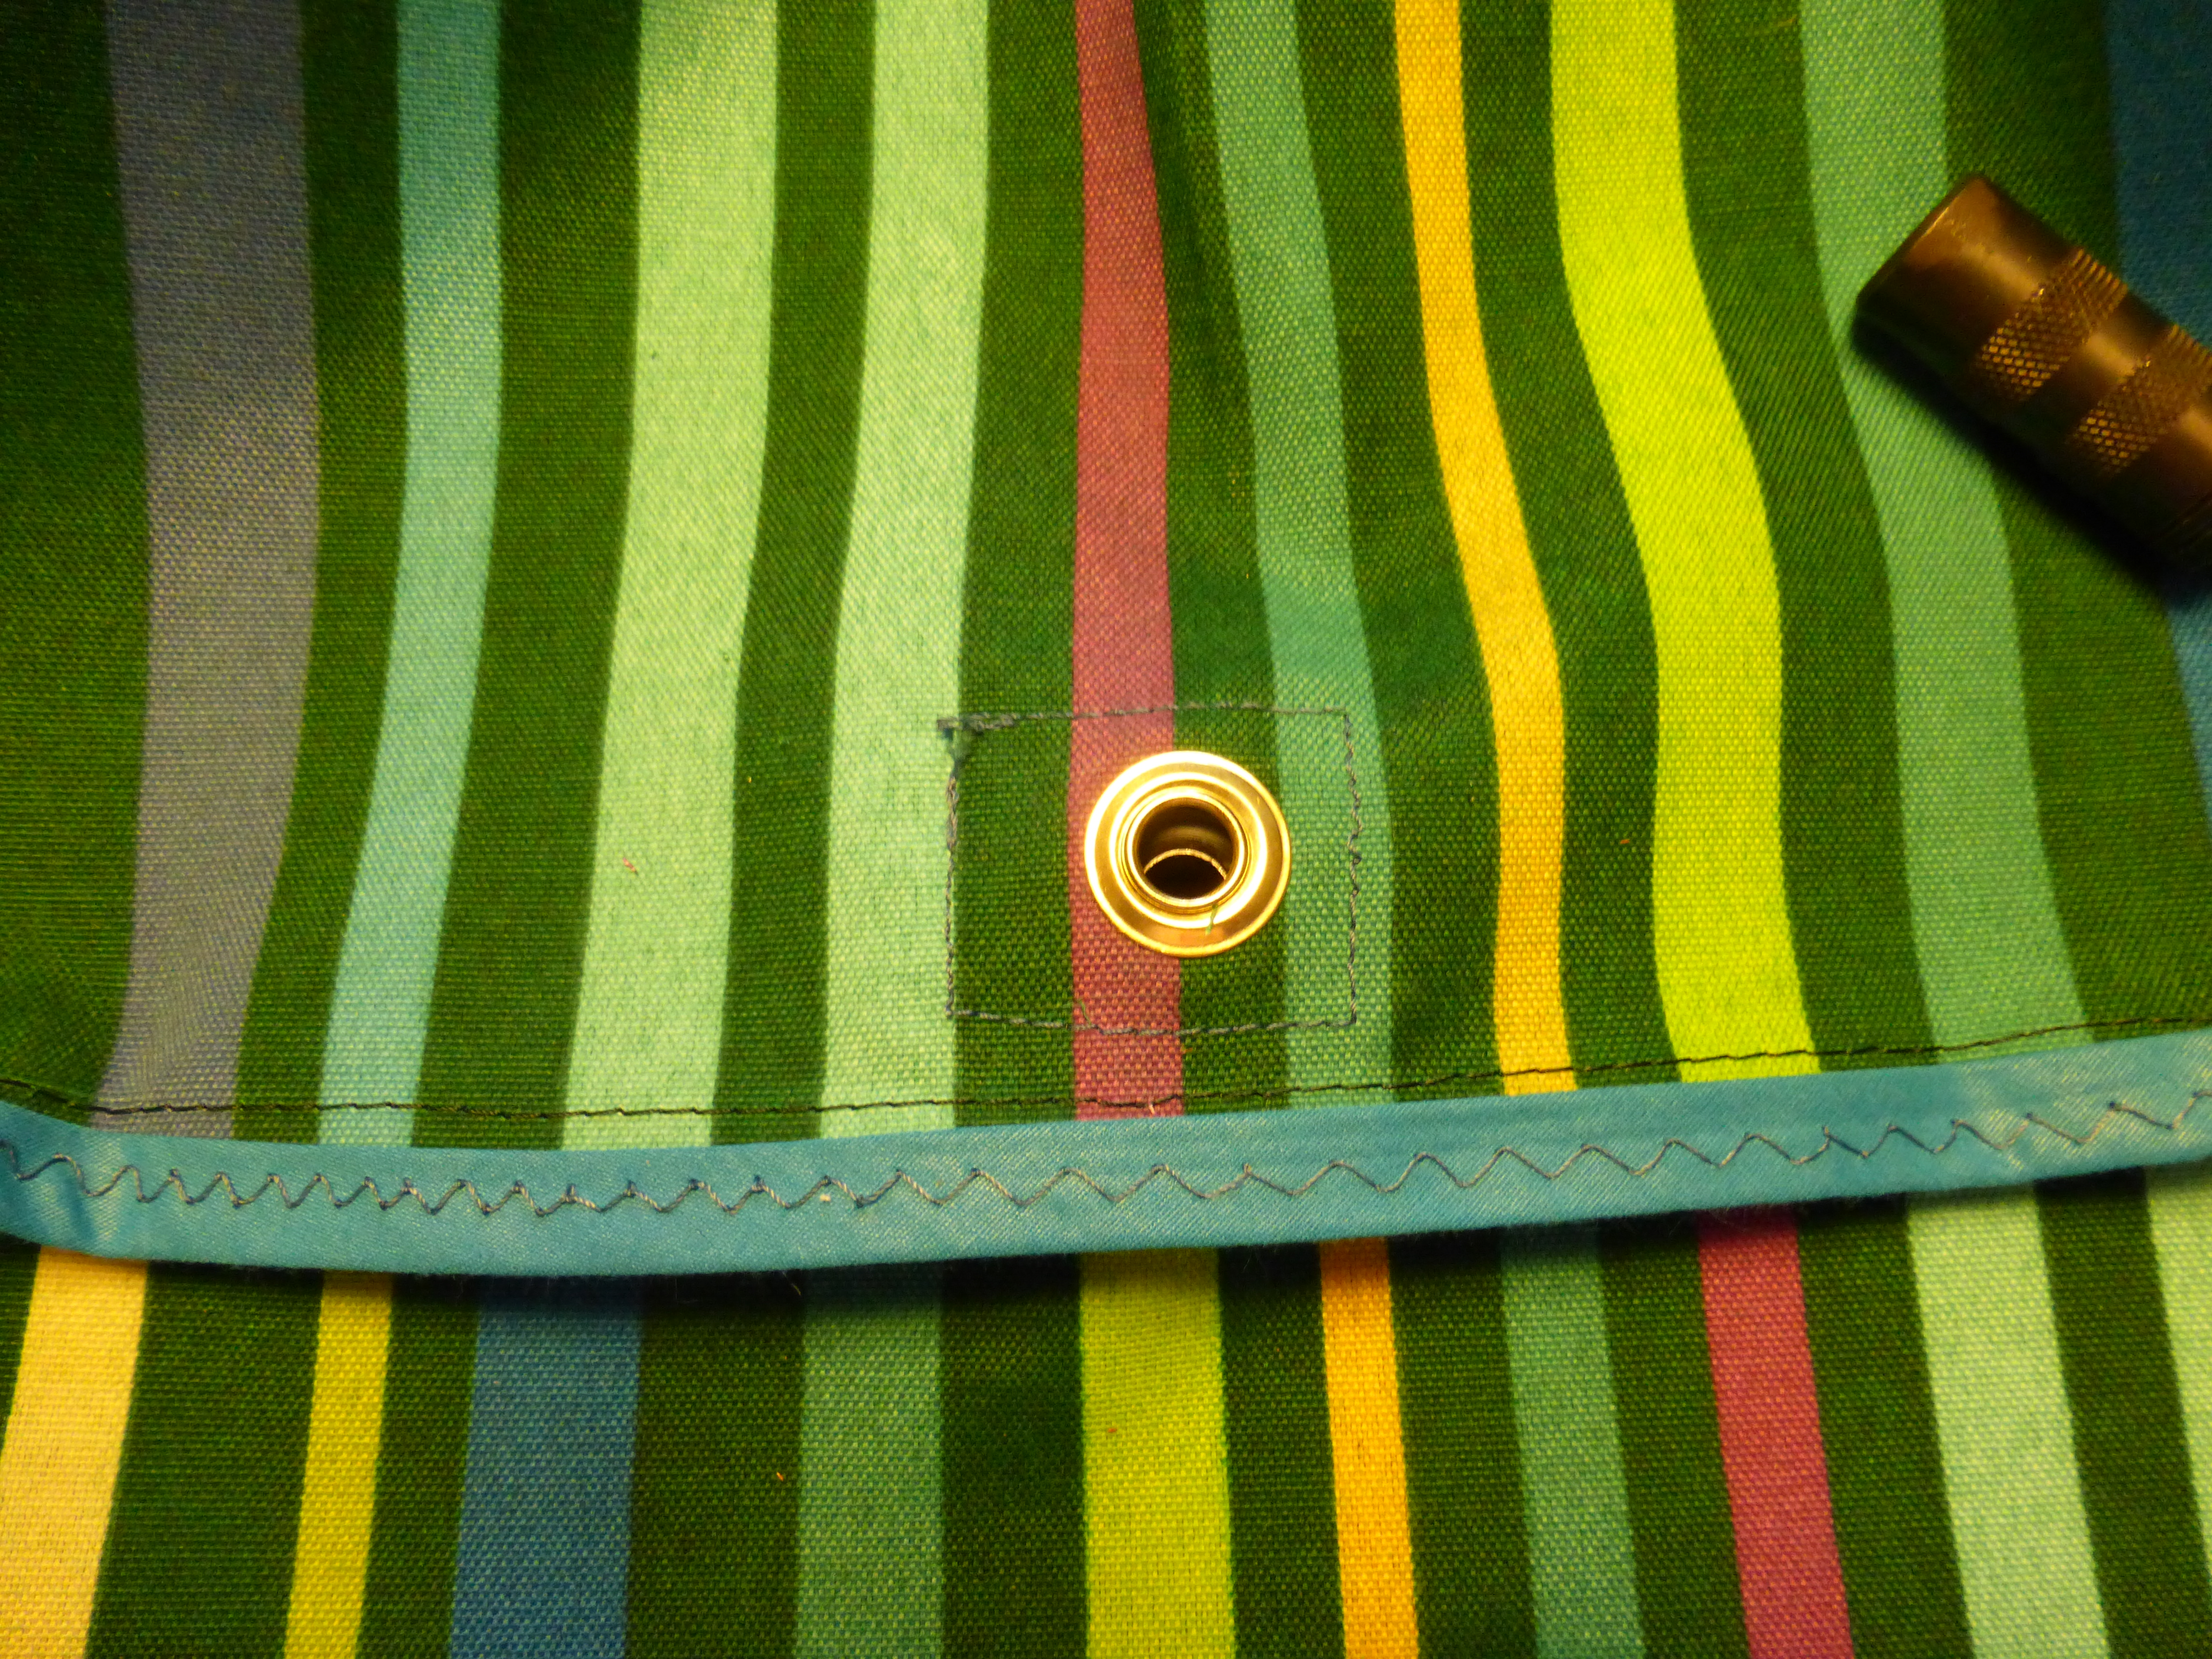
Grommet!
You are DONE! You have done it! Wow. Can you believe it???
Look how nice and neat the awning folds up:

Awning! Folded up all tidy and neat 🙂
Gosh….I just realized how nasty my dining room table pads look. They are so old! They’ve been taped and scraped one too many times. My table is a beauty underneath that hideous table pad, though.
So…..I know. You want to see this amazing awning in action! So do I. I don’t have poles for it yet. Kind of anti-climactic, huh? Once I get some, I promise to update this tutorial. In the mean time, here is a picture of the first awning I made for Midge:

Midge’s awning and window covers
UPDATE:
Here is the awning!
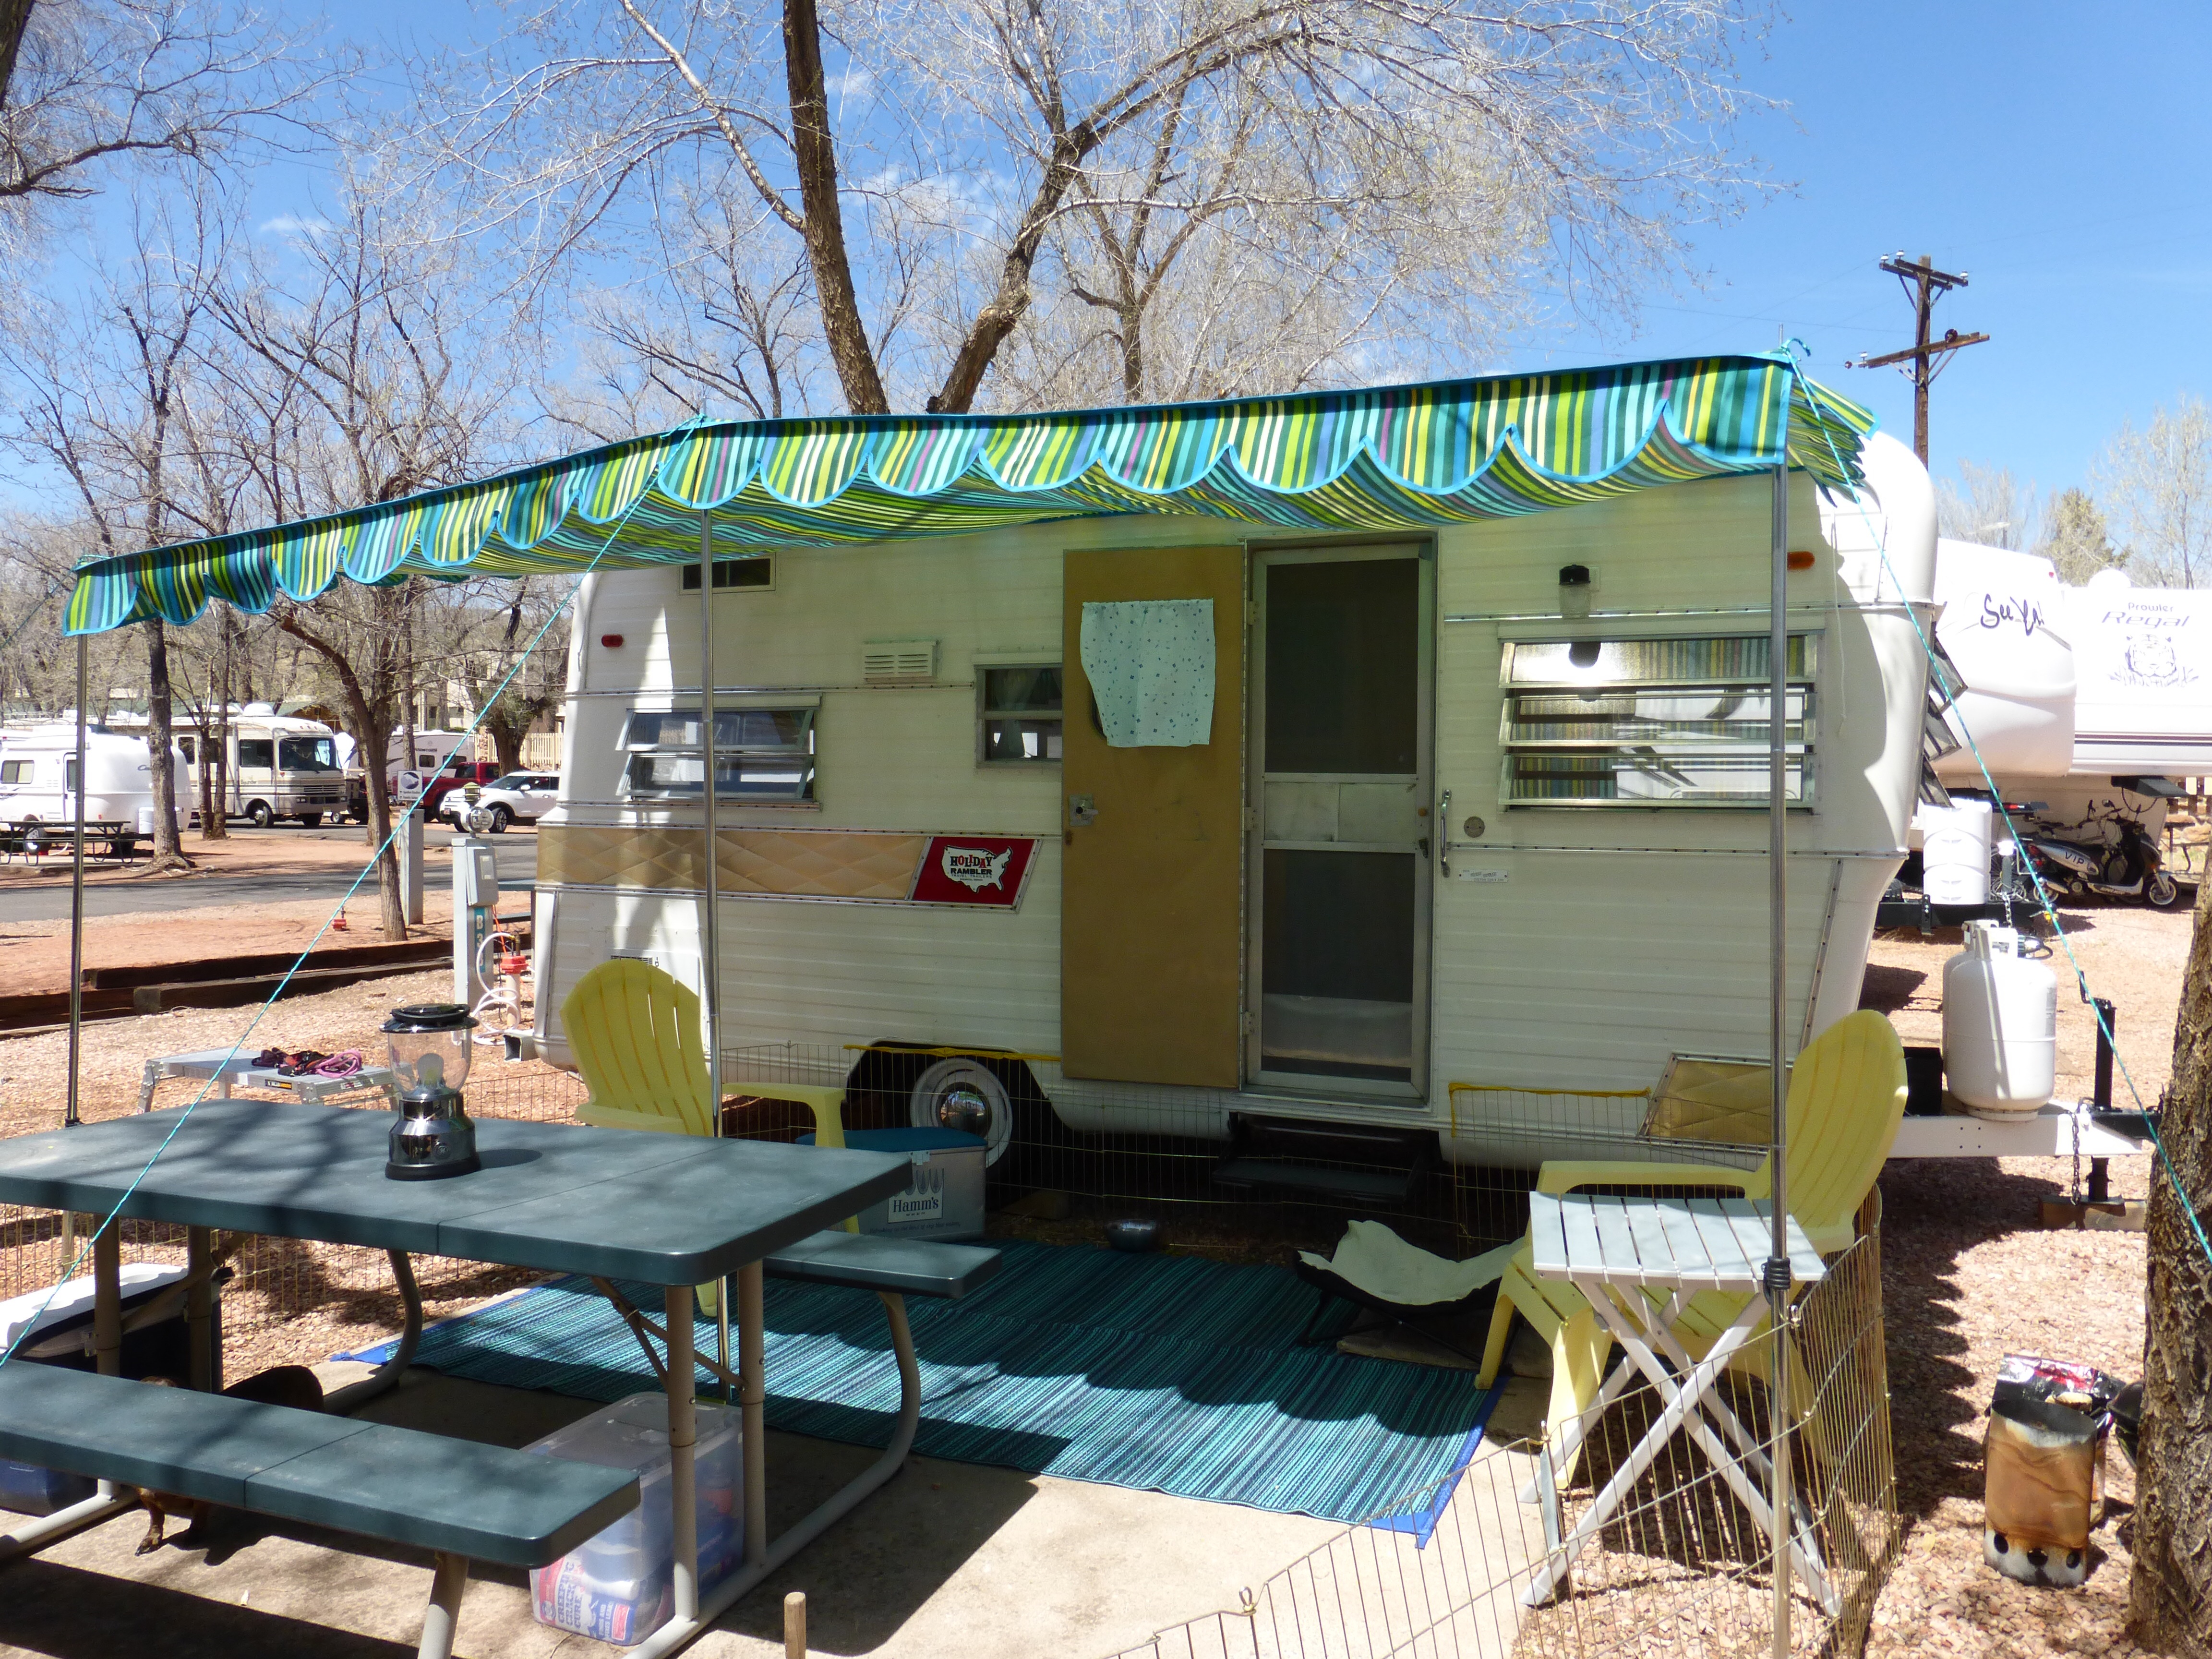
Holiday Rambler Awning
I am going to make a bag for this bad boy awning, too. If I figure that out, I’ll add it here also.
Let me know if you have any questions about this project. Hopefully, it’s not too confusing.


You must be logged in to post a comment.