So….Yeah. I suck at keeping this blog up to date. I had many good intentions and failed miserably. If you still care, I’m here to post some updates on the Holiday House progress! Finally! We have, actually, gotten so much accomplished. Ok, Ok, Ok…my Dear Husband has gotten so much accomplished. Me, not so much. Ready?
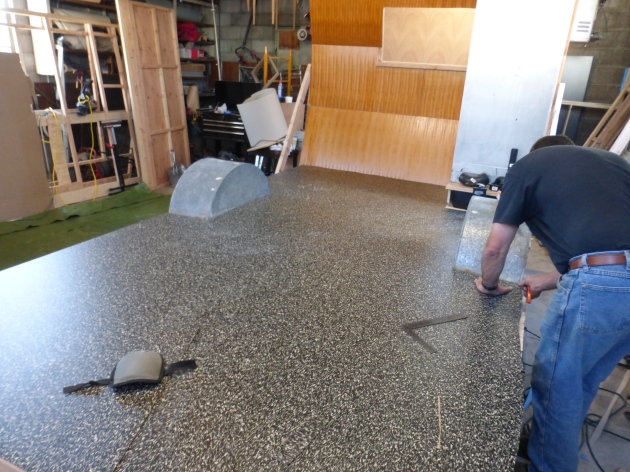
When we last left you, dear reader, I believe this is where we were:
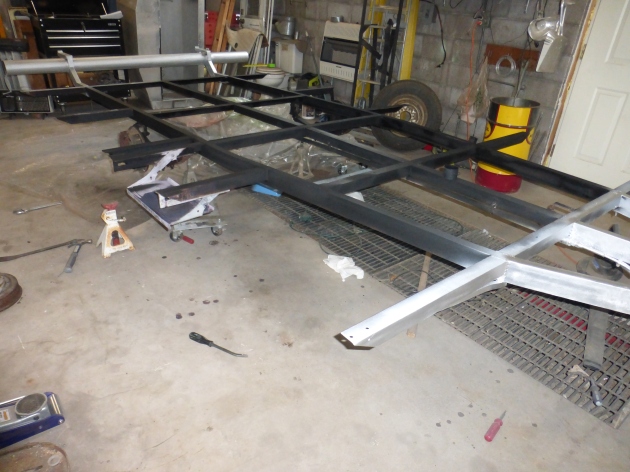 Yikes! I remember that – scared the bejeebus out of me.
We are on the downhill side of this rehab, believe it or not :-).
George consistently amazes me with his skill set. He’s single handedly built or fabricated everything. Craigslist has been his friend, and he has added several items to his tool collection – a huge table saw, drill press, and band saw to name a few. Not sure how we accomplished the rehab of the other 3 trailers without these tools….
Items completed:
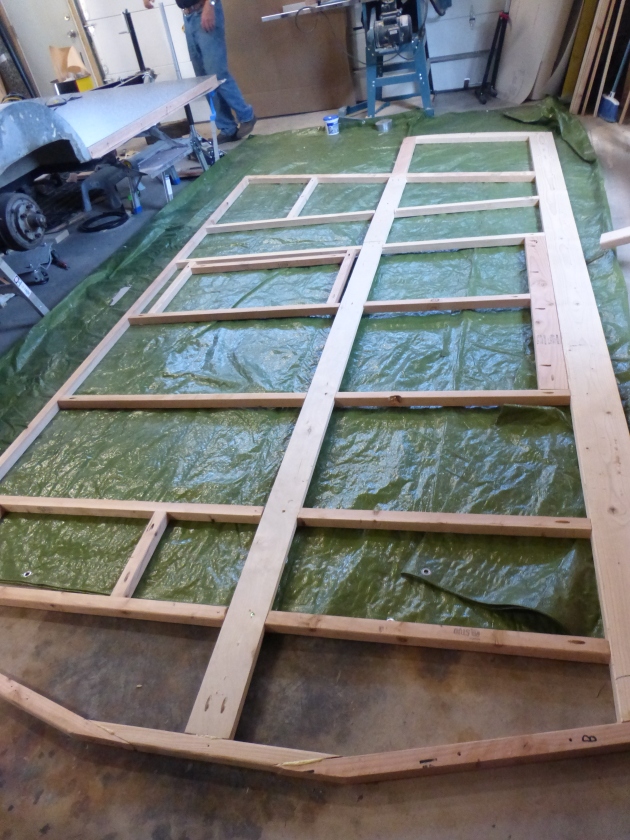
~Installed new belly pan. This consisted of cutting rolled aluminum to size and attaching to the frame. We then added insulation and framing to hold the subfloor.
(Click on pictures to enlarge)


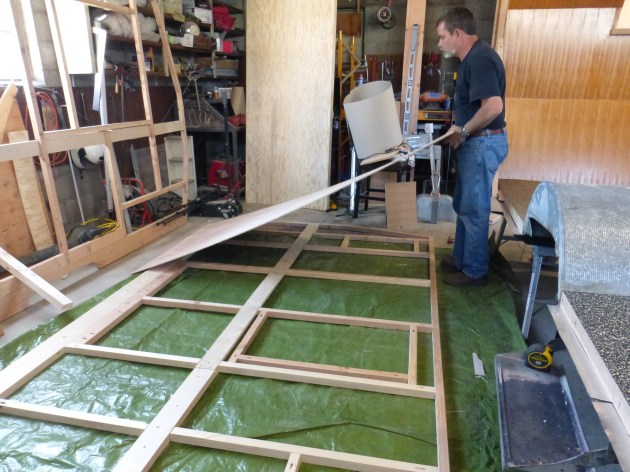
~Installed Subfloor and Marmoleum Flooring. We ordered some really cool Marmoleum flooring! It is Marmoleum “GRAPHIC” 5301, sgraffito. I adore it!
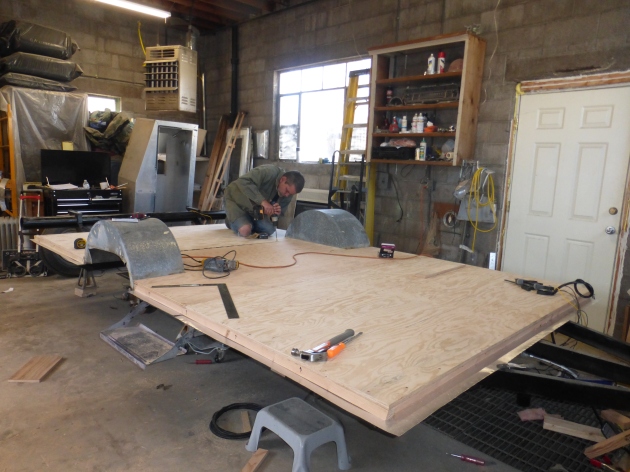
Installing Subfloor
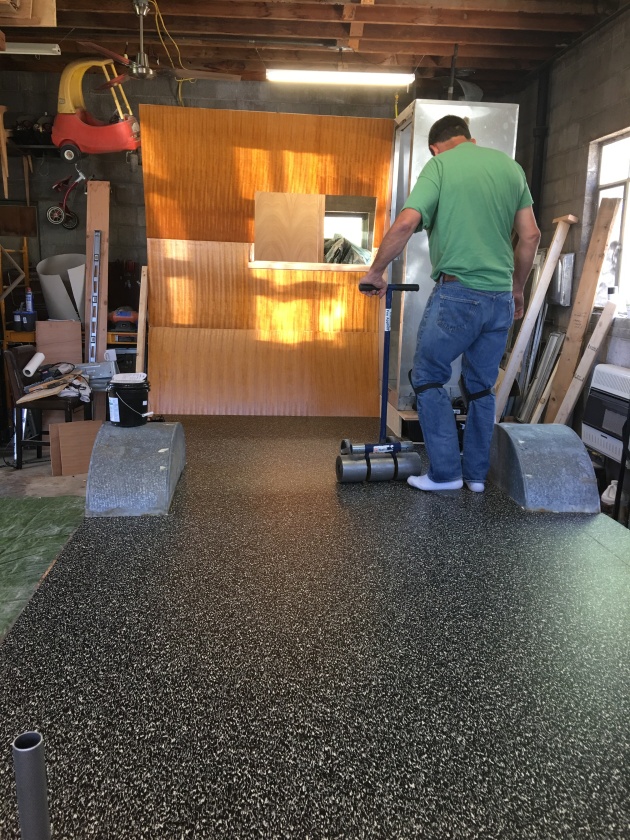
Marmoleum Install
Marmoleum Install
As you can see, above, we had the back wall and bathroom temporarily in place to be sure everything stayed square.
~Installed the framed walls! YES! These were such a headache for George! So much trial and error to get the fit just right. If you remember – the original framing disintegrated when we pulled the siding off the trailer, so we didn’t have an accurate template to use. Holiday Houses are so cool because of the angles, but that makes them a bit of a nightmare, too, if you have to fabricate them blindly. Once again – Dear Husband amazes me!
Wall Framing
Wall Framing
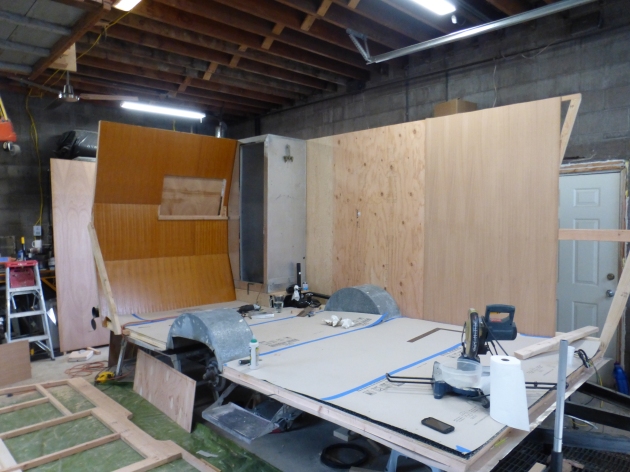
Walls!!
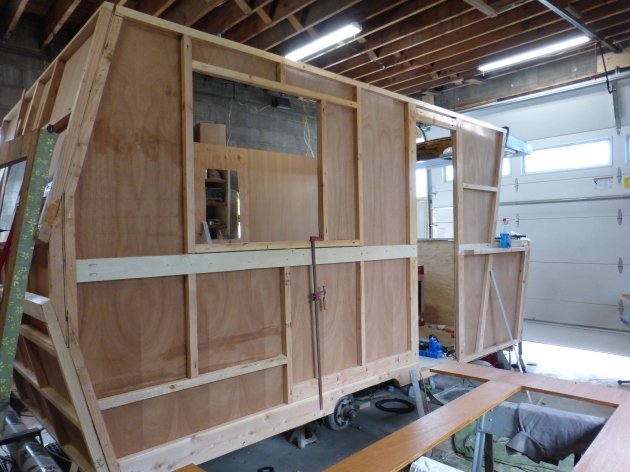
Walls Installed!
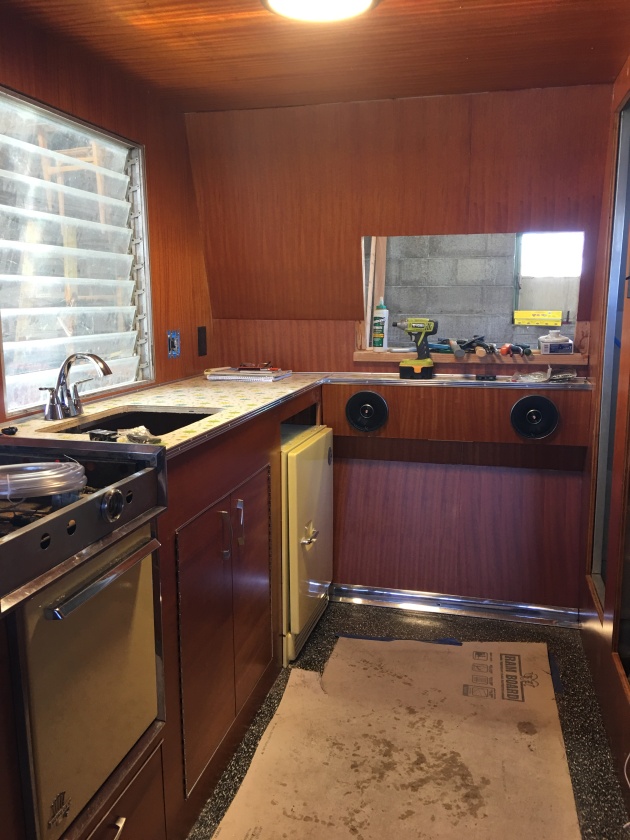
~We used African Mahogany paneling. It is such gorgeous wood, with an amazing grain. We used amber shellac to highlight the grain and give it a rich color. I’m really happy with how it turned out :-).
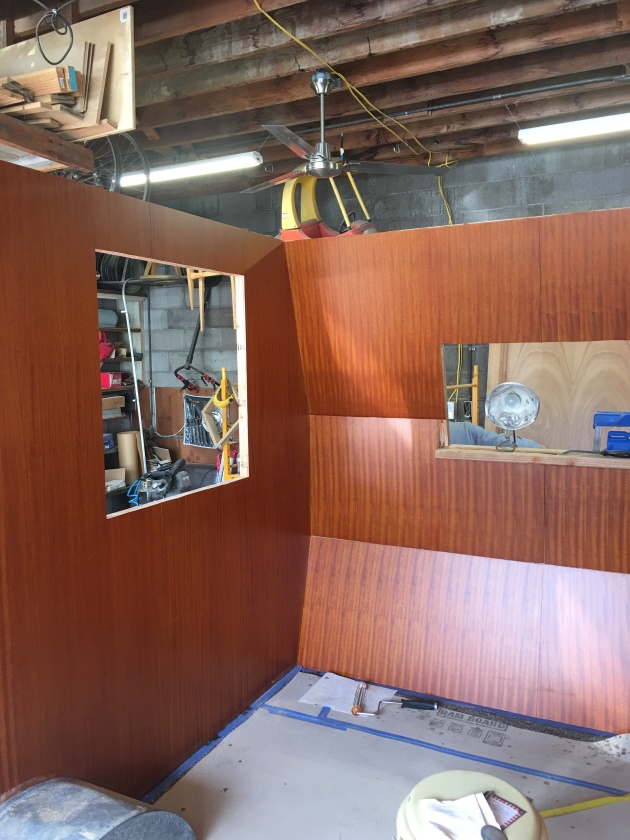
African Mahogany paneling
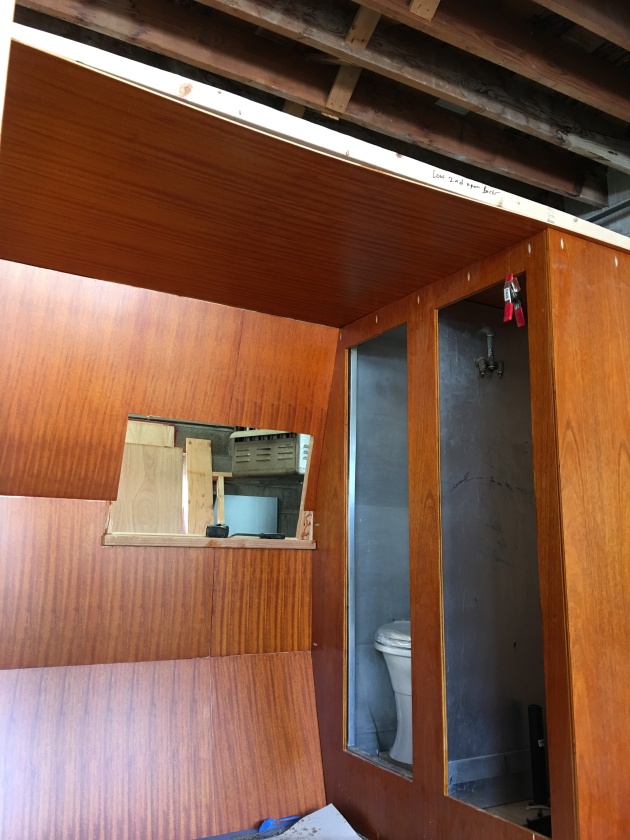
Paneling and bath/closet
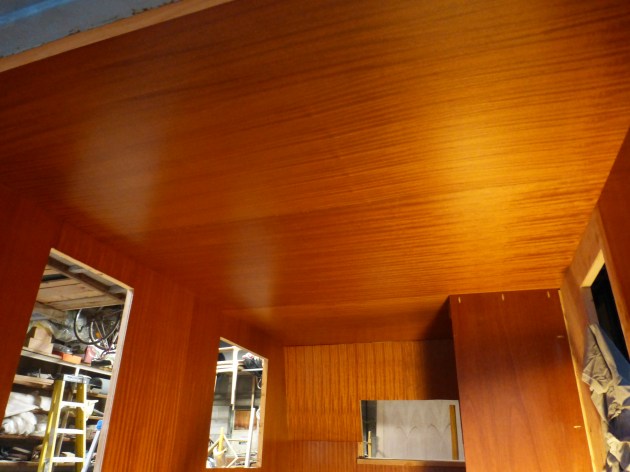
Ceiling
We, also, used satin polyurethane as a final coat. It gives it a slight sheen, but it isn’t too shiny. Once the side walls were up, we installed the ceiling. Then we could frame out the wet/bath and closet area.
~We could not get the original referigerator to work :-(. We could, however, save the original fridge door. We retrofitted it to a dorm fridge and it works great! More than likely, we will always be hooked up to power with this trailer, so it shouldn’t be a problem.
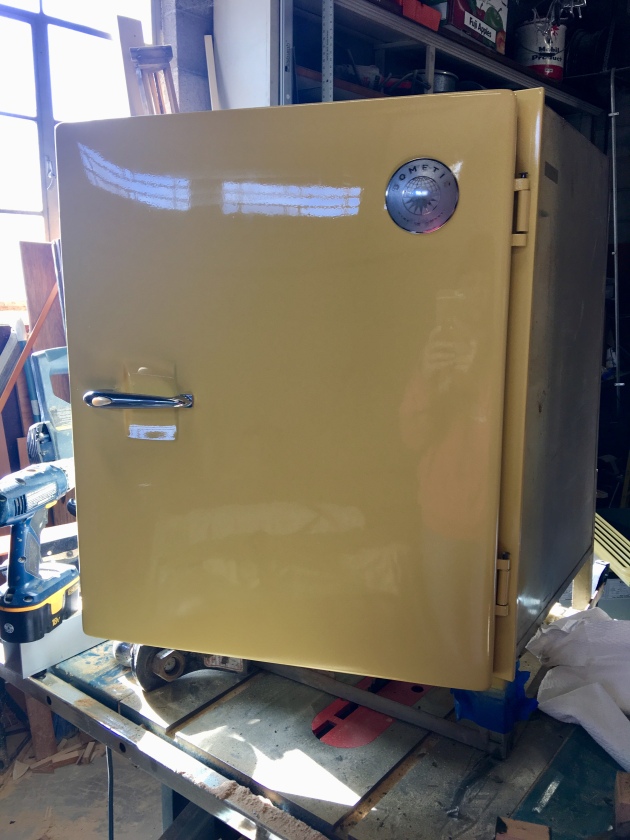
Cutest Fridge door in the world!!!
~We decided to change the floor plan of this Holiday House. The original floor plan was: dinette in front, kitchen on road side, gaucho couch on curb side across from wet bath. In doing some research, George saw a Holiday House floor plan showing a U shaped dinette/lounge in front with the kitchen on the curb side across from wet bath. We decided we liked that floor plan better, so we reworked the plans to make it work. The U shaped dinette will turn into a full sized bed with storage beneath the benches. The original floor plan had 2 sleeping areas – the dinette and the gaucho couch – but, we decided we only need 1 sleeping area, and I like the larger kitchen area. Because of the new configuration, George will add a couple springs to the curb side axle, to assist with the additional weight on that side.
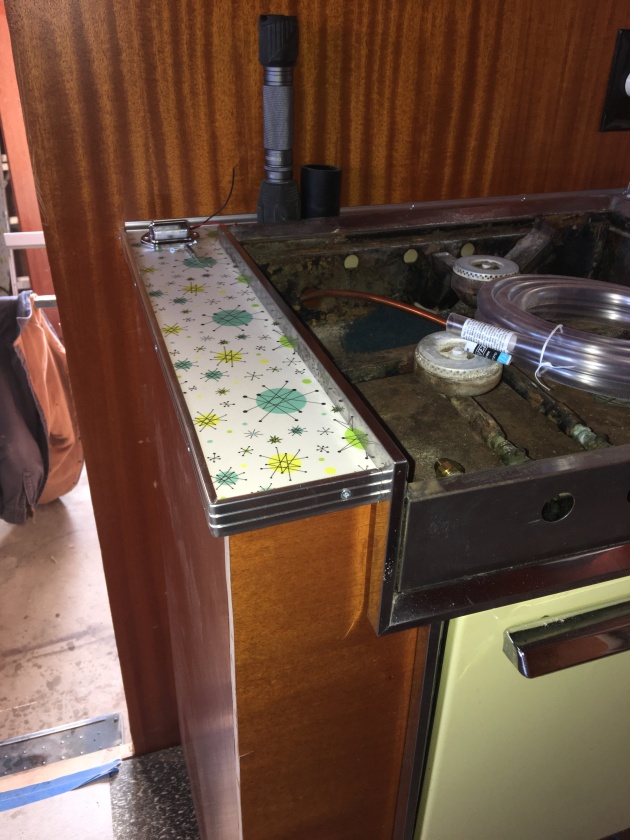
~Installed new custom laminate counter tops and vintage style metal edge banding. They really brighten up the space and have a fun atomic design.
Kitchen
New countertop and metal edge banding

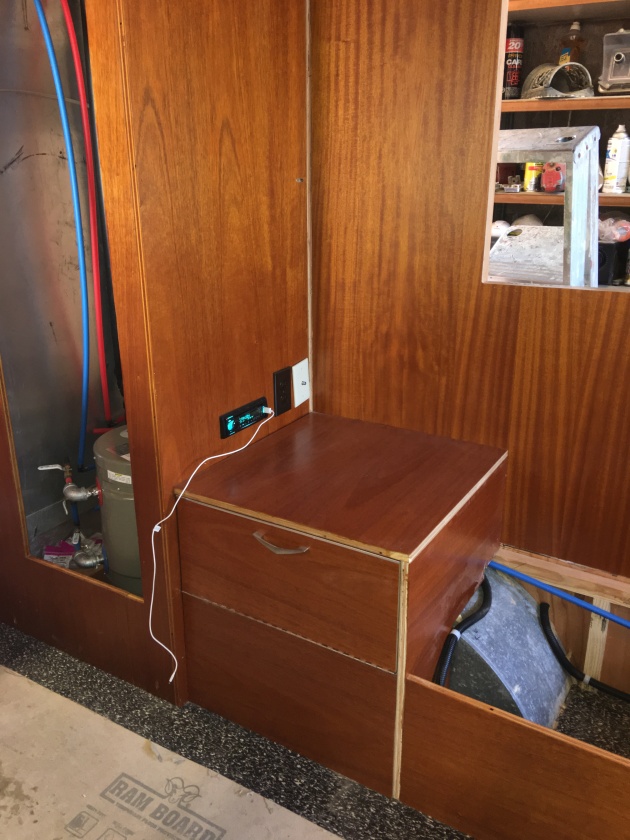
~All new electrical is installed. We added more outlets and charging ports for all the tech stuff. We still need to install a couple light fixtures, and the Fantastic Fan. We are going to install the fan in the ceiling of the wet bath instead of in the middle of the main living area. The wood ceiling is so pretty we decided not to mar it with an ugly fan. George installed some cool foot lights throughout the trailer. They are from a 1961 Lincoln. He, also, installed a sweet stereo system and speakers. It’s going to be a great place to hang out!
Lounge/Stereo area
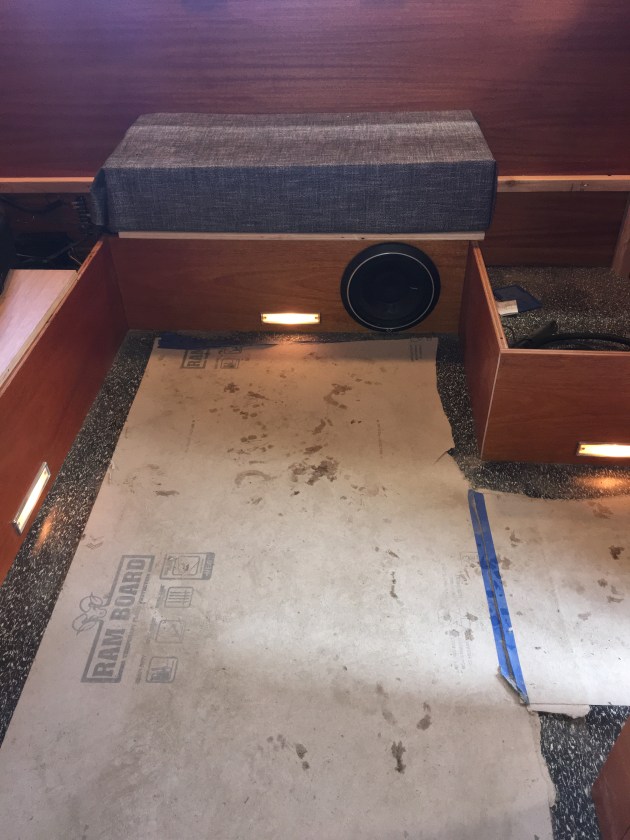
Cool foot lights and subwoofer
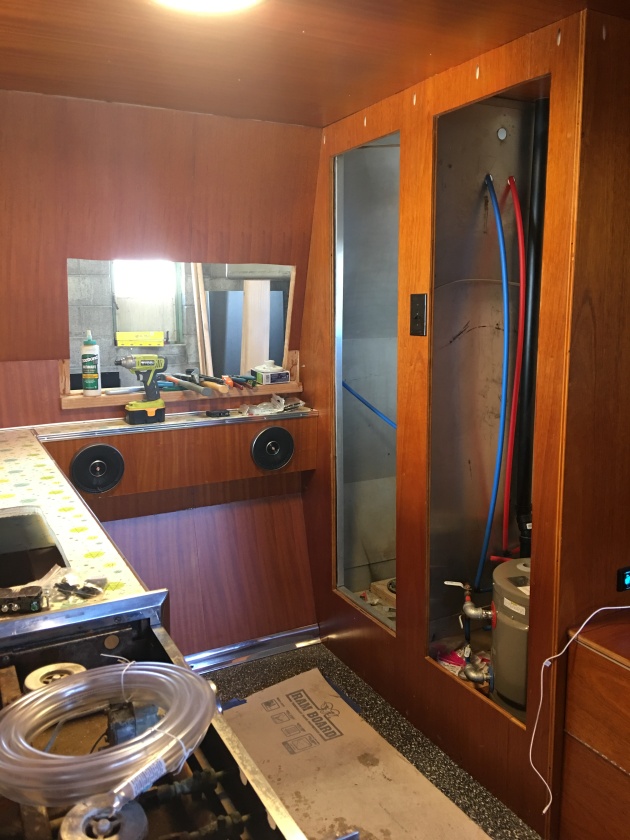
Kitchen, bath, rear speakers
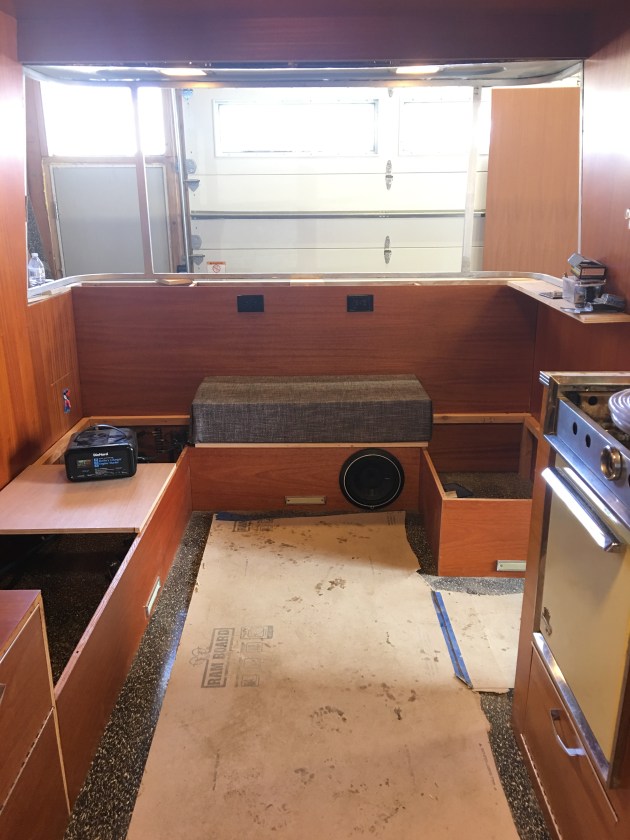
U Shaped Lounge Area
~We have received the new curved front windows. We found a man in California that makes them. He was coming out to Colorado for an event, and brought them to us, which was great! Saved us a butt load on shipping costs! The original flat glass front window is in good condition, so we didn’t have to replace that one. In fact, all of the original windows are in good condition. The door is missing a couple louvered pieces of glass, but they shouldn’t be a problem to replace.
That is a brief update on the ridiculous amount of work performed by my handsome and talented husband. I know there are many steps left out – I spared you some of the gory details and mishaps.
Still to do (in no particular order):
- Finish plumbing installation.
- Install Fantastic Fan
- Run Gas Lines to stove and water heater
- Install front window wrap around counter
- Paint and install fiberglass eyebrow piece
- Build and install upper kitchen cabinets
- Install new aluminum skin
- Paint skin panels (some will be left polished)
- Sew Cushions for U-shaped lounge
- Sew Curtains / hang curtain hardware
- Sew Awning
We need to find a replacement stove top for the original Princess Stove/Oven. The original stove top is too far gone. Hopefully, we stumble across one in the next few months. If not, we may see about getting the original one powder coated with high heat material.
That’s my Holiday House update!!!!! As Dear Husband has stated to me: I need to get my ass sewing :-/. Yep, I guess I do.
Since my last update we had some amazing camping trips! Our Friendly Average Campers group is the bomb – we had so many great camp outs with them! They are a super fun group!! We displayed at the Denver Modernism Show in August, too! I guess I need to post about that, and show you the trailers we had on exhibit. Once again, the trailers were the hit of the show! I’ll try to get on that….
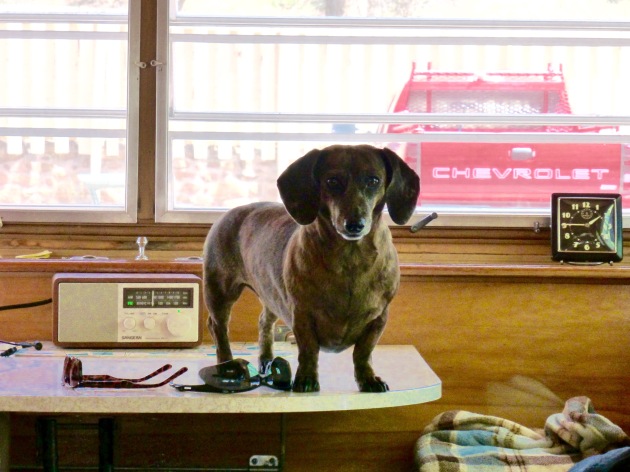
I need to add one last thing: We lost one of our beloved pups right before Christmas (I’m beginning to hate the holidays). Our dear sweet dachshund, Lucy (9), died suddenly on 12/15. She was the sweetest little girl. She adored camping! Her excitement was contagious when we would ask “who wants to go camping?” She would be the first to jump in the trailer or the pickup. It’s going to be sad without her this coming camping season. I love you, Lu-Lu Belle.