
Holiday Rambler Kitchen
Well, we have finished up the inside of the Holiday Rambler. It wasn’t nearly as time consuming and brain draining as poor Midge! Bless her heart.
Some of the accomplishments over the past few weeks:
- New water heater
- New water pump
- New fresh water tank
- New shower floor (talented husband made a shower pan and lined it with a scrap of left over linoleum. Cost = next to nothing!)
- Ran new Pex water lines throughout
- Installed new curtain hardware and made curtains
- Reupholstered all cushions
- New coat of polyurethane on all woodwork
The cushions actually look pretty good! They blend well with the walls and turquoise accents.

Holiday Rambler Gaucho End

Holiday Rambler Dinette Cushions
The IKEA curtain tracks work really well. They are kind of a pain to put up if you are connecting multiple rods together like we did along the front windows. We made a continuous track that curves at the corners and covers all 4 front windows. We used this same curtain system in the Airstream, and I really love how they look and function. The curtains turned out pretty cute! They really are a great compliment to the turquoise appliances. I bought this fabric years ago with no real project in mind….I just loved the fabric! I can’t remember how much I paid for it, so in my mind that means the curtains were FREE. Don’t ask me about my logic….it makes perfect sense to me. So…..fabric expenses for this little project have been pretty flipping reasonable! I bought 26 yards of upholstery fabric for the cushions for a whopping $50….and I still have about 10 yards left! In my mathematical mind, I come up with about $30 for the cushions. Wowza. That is pretty awesome.

Curtains and IKEA Track
The original light sconces were silver aluminum, but they had rust stains. I painted them black. Thankfully, the paper vellum inserts were in great condition. These lights are so cool! They have a regular 110 bulb and a 12 volt bulb. We can have lights whether we are plugged in to power or not! Not too shabby for 1965 :).

Holiday Rambler light cover
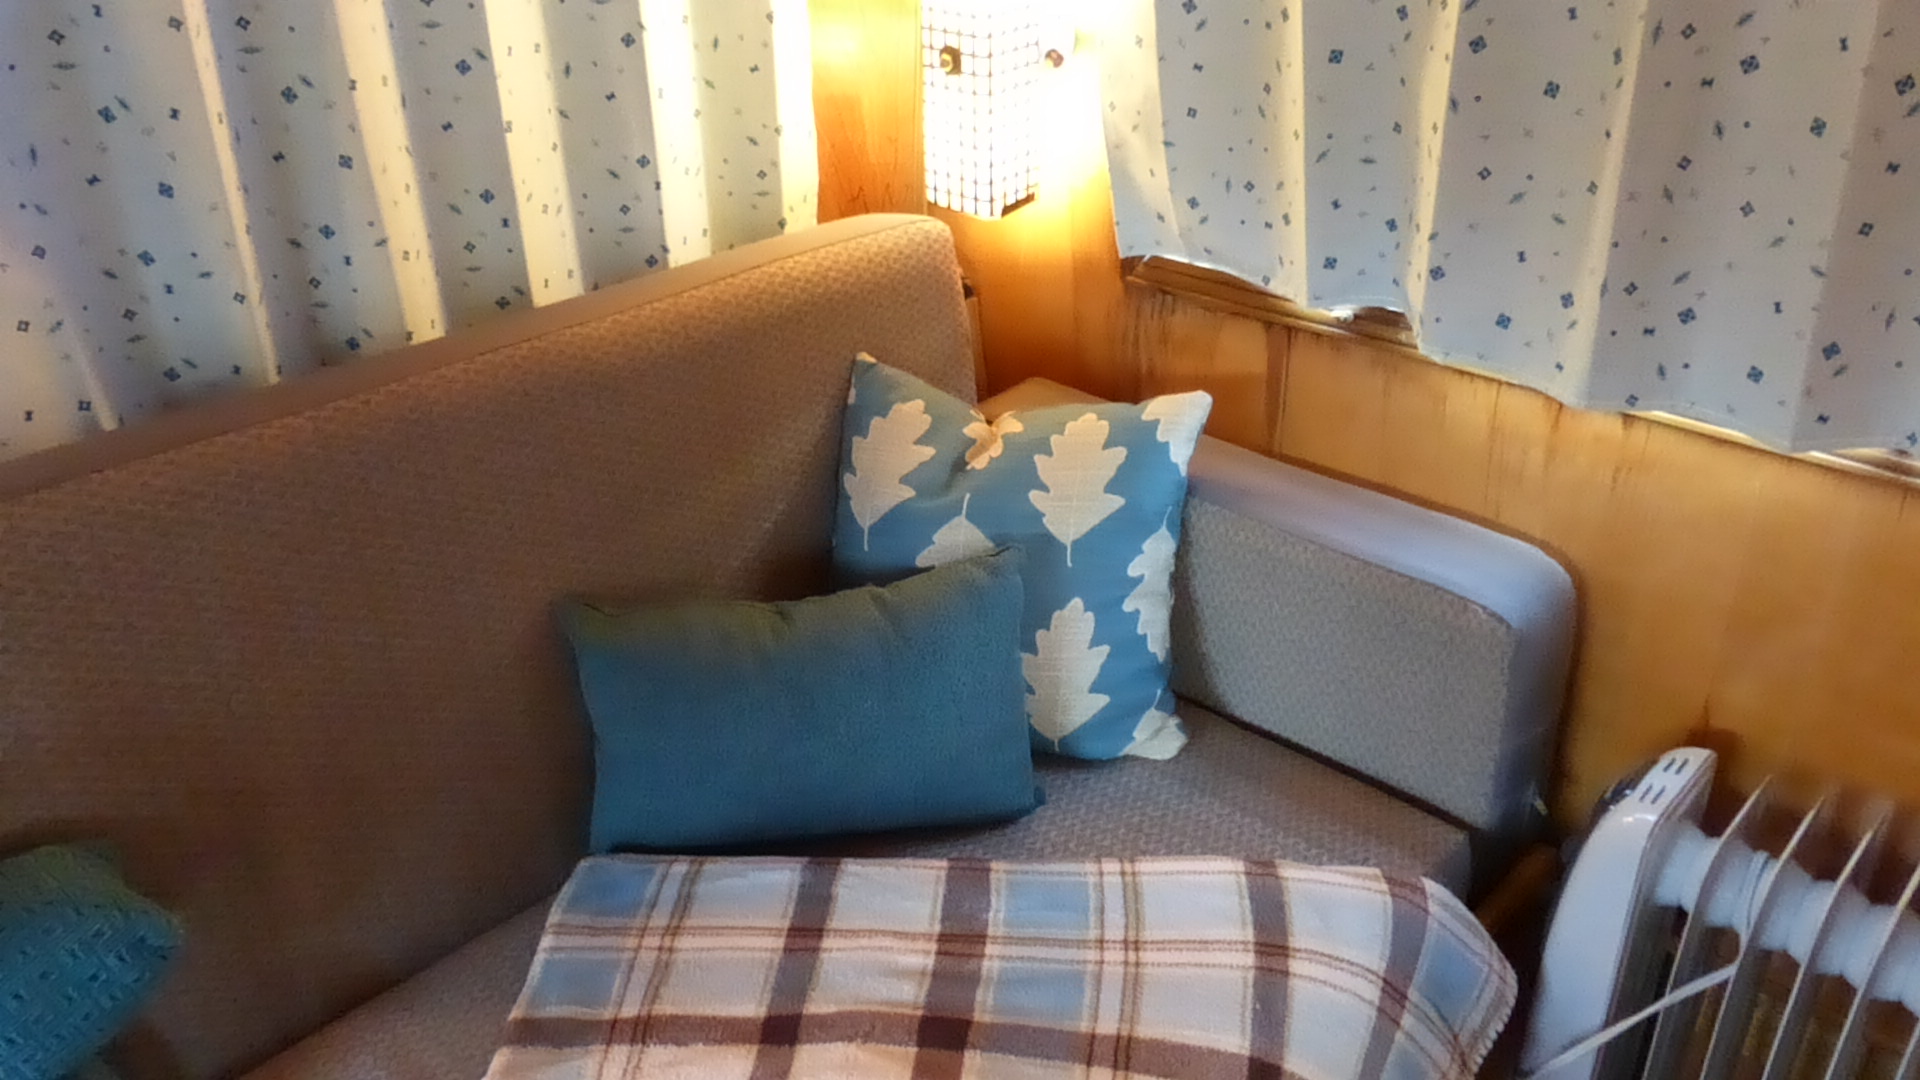
Holiday Rambler Gaucho
The shower/bath is shown below. The linoleum worked great! It is a REALLY tight space and I don’t think we will use it much unless it’s an emergency or we just can’t stand the filth any longer. Notice the original toilet! Still works as good as new! I know…TMI. Dear husband was VERY excited about saving this little piece of history. The things that we get excited about have really changed over the years.

Holiday Rambler wet bath
All in all a pretty productive few weeks. It was not without its surprises, though….some good and some bad.
THE BAD:
I ruined the “Silent Butler”!! I KNOW.
A previous owner had smeared polyurethane all over it…..poorly. I could not get it off without stripping the great graphics. I am a little sick about it. I looked in to getting decals made to replace graphics but the sign shop wanted $80, and I thought that was just too much.
Ready?

Silent Butler BEFORE

Silent Butler AFTER
Isn’t it sad?? Nothing I tried worked. It was an all day ordeal and I am not happy about it.
Anyway. Moving on!
THE GOOD:
The previous owner told us that the adorable turquoise fridge did not work. At all. I was really sad that we were going to have to find a new fridge and trash the original one. Well….while I was applying polyurethane to the interior wood, I opened the fridge to poly above the door. IT WAS ON. COLDER THAN YOU CAN IMAGINE. OOOOO MMMMMM GGGGGG!!!!!! I am so happy! I don’t know if the trip down to Denver from the mountains jarred something loose and cleaned something out, but it is working!!! The thermostat control works. It is cold. I just can’t believe it! We have not tried the fridge on propane yet, but at least I know it works when plugged in to electric. Yay!

The Fridge WORKS!!!
So, now we move on to the exterior. This will probably be much more difficult. We have to somehow get the caulk and silicone off the aluminum trim. A previous owner REALLY liked caulk and silicone. The exterior is in desperate need of new paint. So, we need to mask off the trim and windows and spray some paint on this baby. We need to replace the tail lights and affix new emblems and decals.
I am making another awning for the Rambler. I was going to buy one online but then I found some cute awning fabric for $2.95 per yard….so I guess I will save the $$$ and make one myself. I found the fabric on Fabricguru.com. I am kind of dreading it, but since I’ve made one before this time shouldn’t be too bad. AND the whole thing will cost about $75.
Here is the fabric:

Awning Fabric
If the weather cooperates, we should have this thing done very soon :).
We are itching to go camping! Not sure where the first trip will be with the Rambler, but I’m sure we’ll come up with someplace fantastic to go. Midge is ready and waiting for her next trip, too. Not sure where I’ll find the time to enjoy both of these awesome campers! It’s a nice problem to have, though.
Will keep you posted on the exterior rehab and the awning.

I’m so impressed, it looks great! I’m getting to the point of redoing our upholstery and you have motivated me, thanks!
Thanks! Your Airstream is awesome! I can’t wait to see the finished product. Good luck!
Beautiful! Ya’ll did a great job…love it!
We just bought a 1967 24 Holiday Rambler Camper. It was maintained pretty well and is in good shape.We live in Denver and are interested in joining the Ramble On Club but I cannot find any information on it. Can you direct us? You have done beautiful jobs with you redos on both campers. I just took measurements to get curtains in first. I too love the louvered windows. We haven’t even opened the awning yet as we haven’t gotten it moved. Your awning has inspired me to maybe attempt that down the road.
Thanks for sharing this, that’s a lot of hard work and what a beautiful job!! I was wondering why my Rambler had two light switches on the lights in the front of the trailer, now I know! 🙂
i have one almost just like the rambler and wanted ideas on how to redo it.